Multi-level internal network penetration (native tunnel)
What is a multi-level internal network
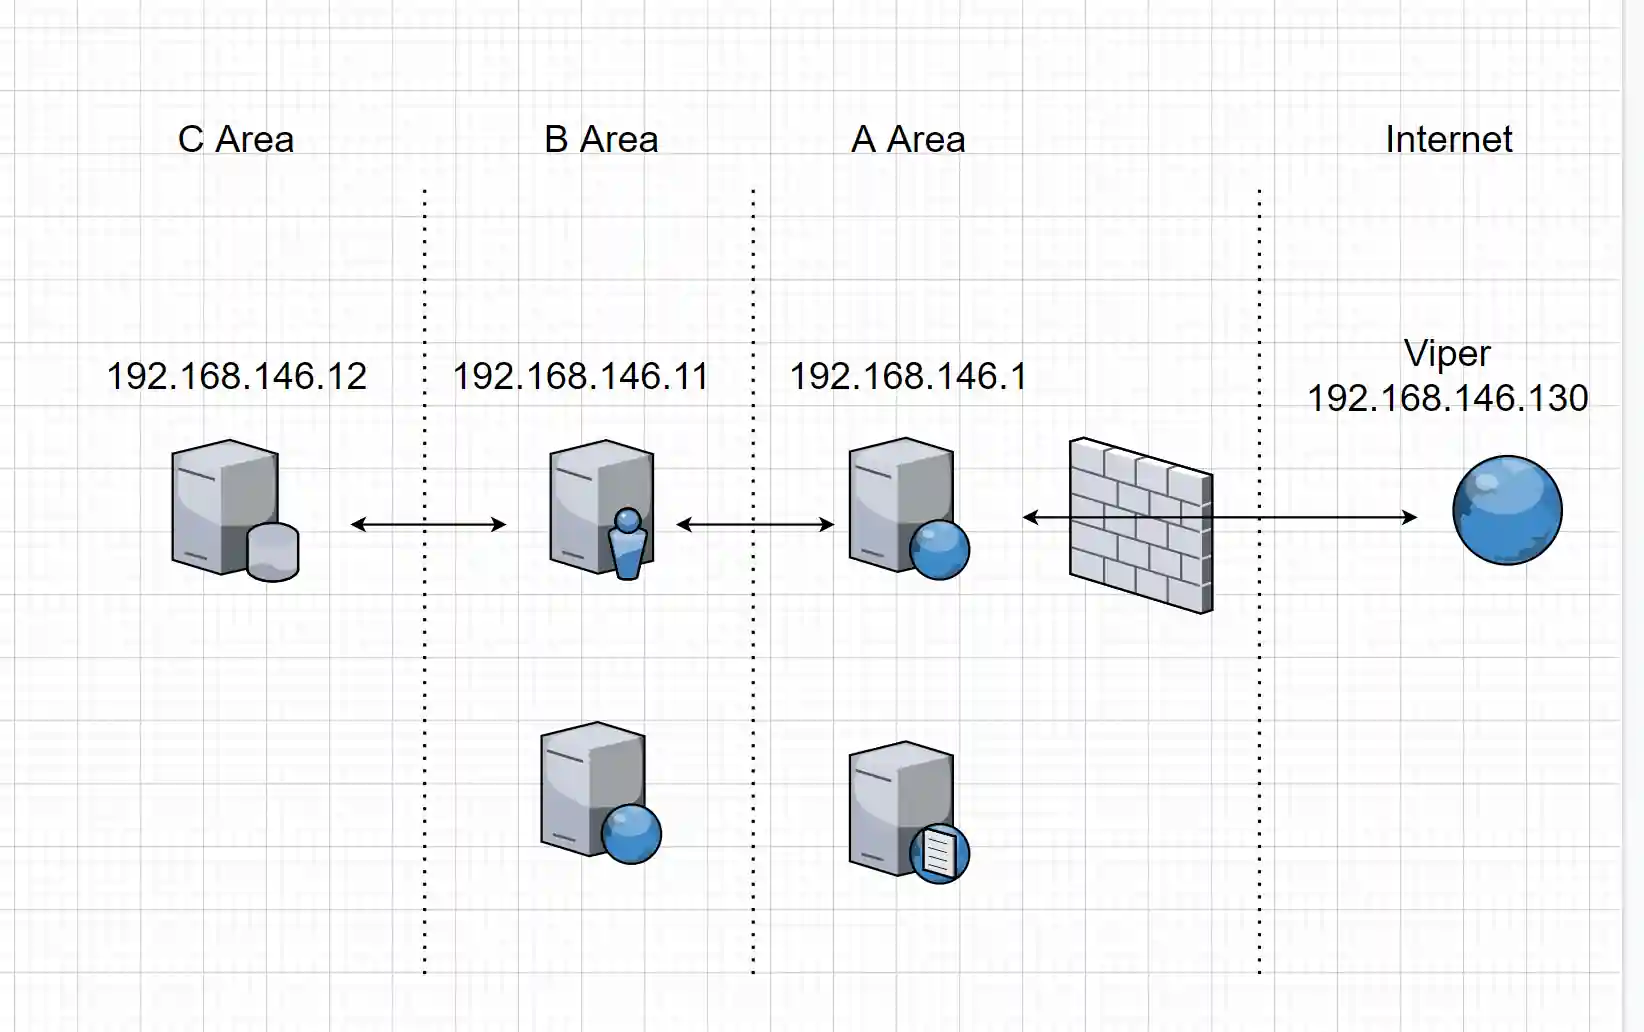
The multi-level internal network mentioned in the title is common in various large enterprises. For example, as shown in the following figure:

In network A, there are generally the DMZ area of the enterprise, including external web servers, DNS servers, etc.
In network B, there are generally the server area of the enterprise internal network, including domain control servers, internal network OA, etc.
In network C, there are generally the red area of the enterprise, including databases storing sensitive information or various key business servers. (For example, the HIS of a hospital, the industrial controller of an industrial enterprise, etc.)
In this kind of network, network A can connect to the Internet, network B can connect to network A and network C but cannot connect to the Internet, and network C can only connect to network B.
How to penetrate a multi-level internal network with Viper
At present, most of the Internet introductions on using msf for multi-level internal network penetration are to use the methods of internal network routing/port forwarding or using third-party tools to forward network traffic.
This article introduces how to use the native session communication channel method in Viper for internal network penetration. This method is the simplest to operate and relatively stable. Its principle is similar to the native multi-level forwarding function of Cobalt Strike. The function in Viper is stronger (supporting forward/backward connection and supporting Windows and Linux).
The network configuration of the experimental environment is as follows:
- Connect to 192.168.146.1
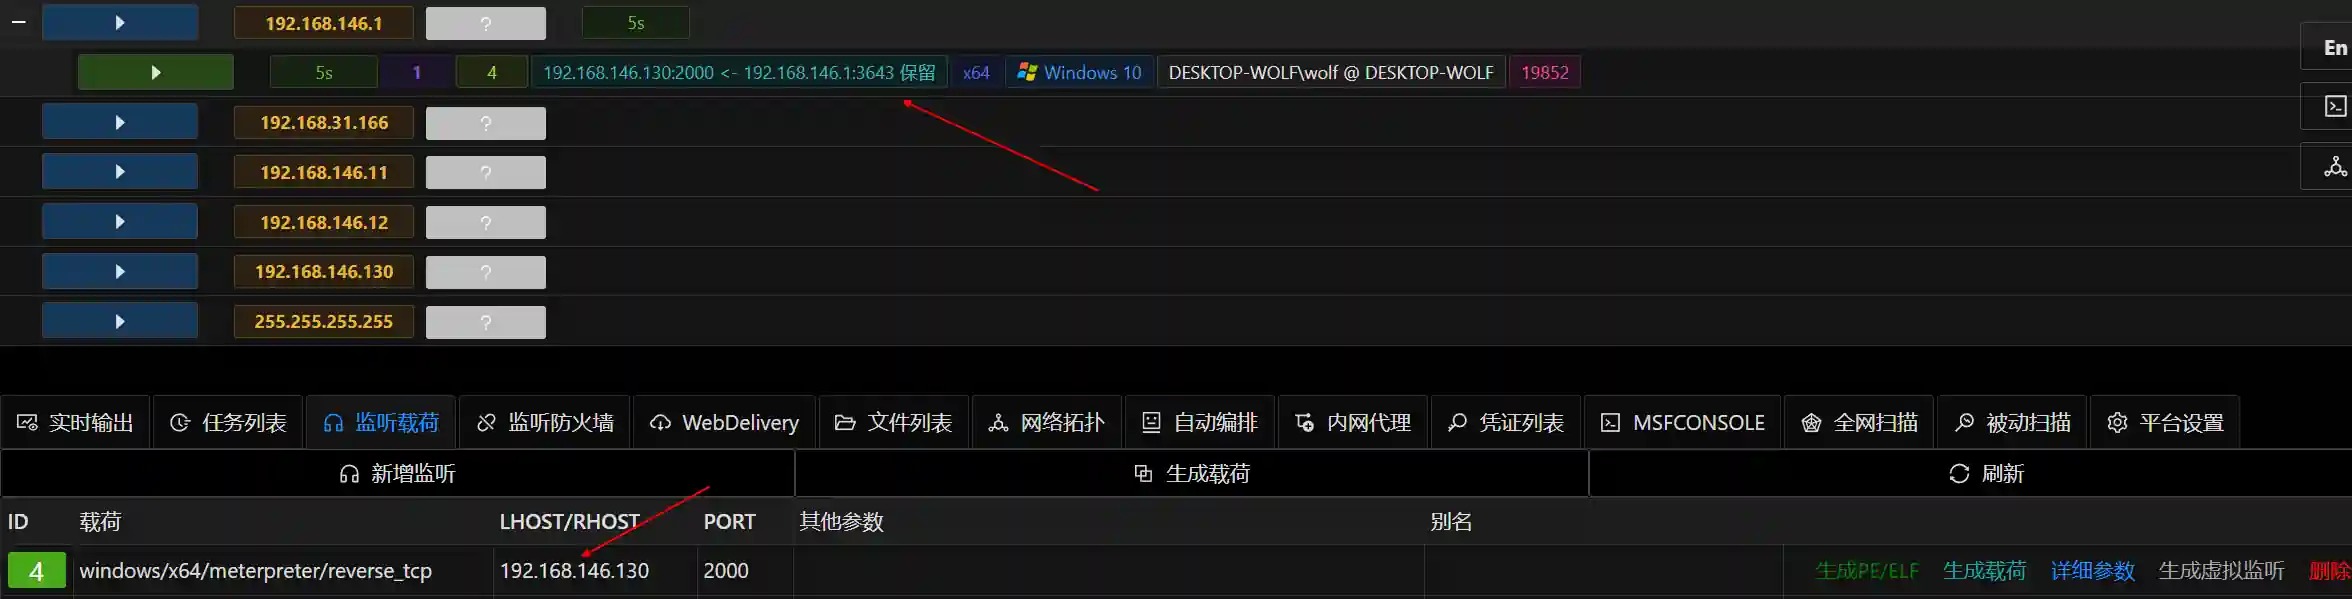
- Use meterpreter_reverse_tcp and connect to 192.168.146.11 through the session of 192.168.146.1
Set up a new listening as follows:

Generate a payload and execute it on 192.168.146.11


It can be seen that the newly generated session has a connection flag at the end, indicating that Session 2 is connected through Session 1.
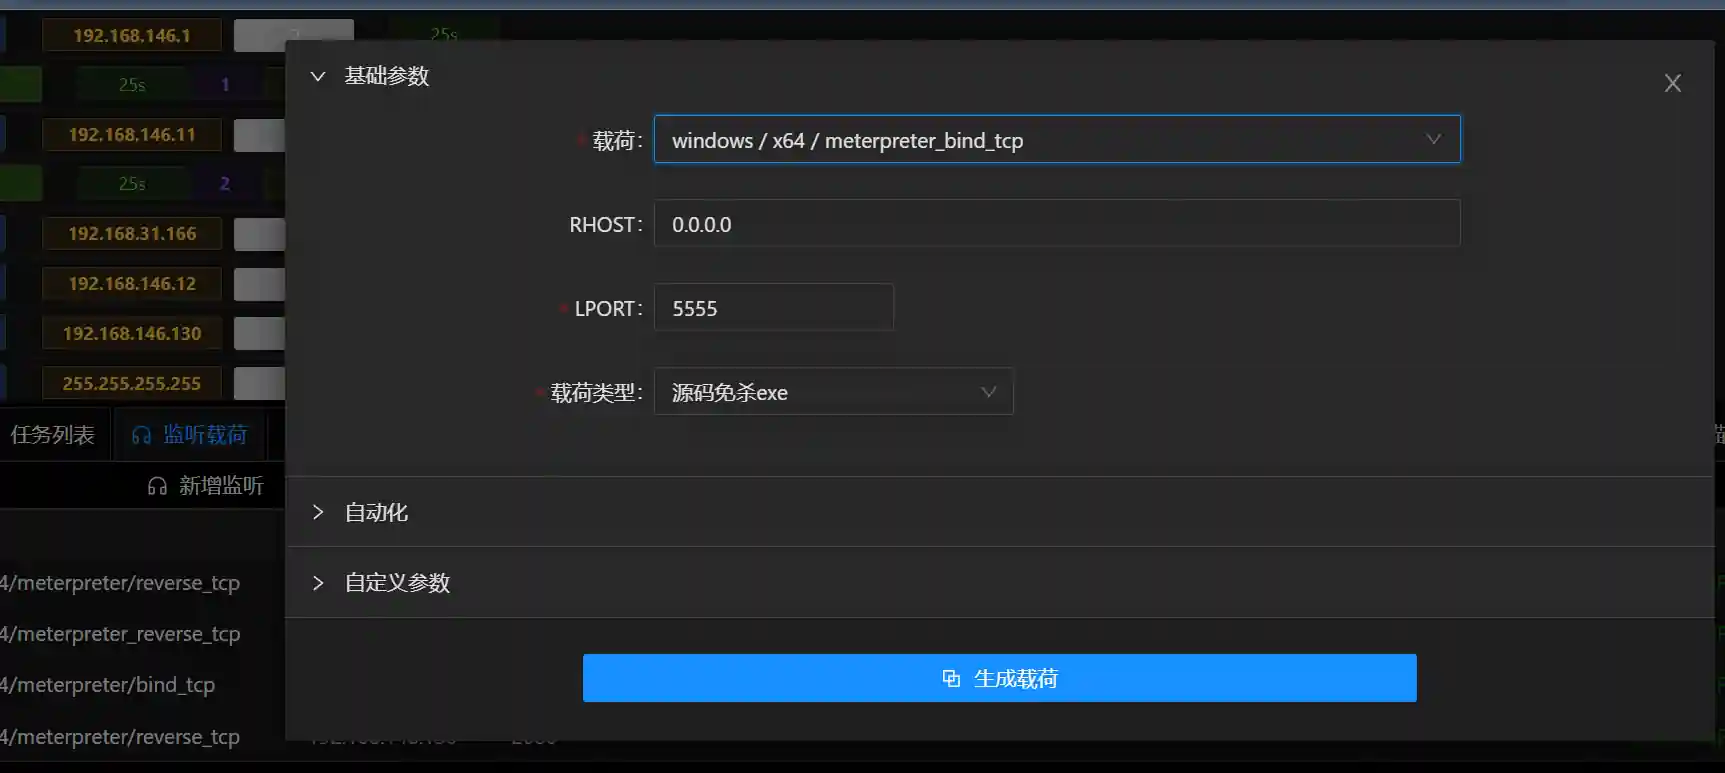
- Use meterpreter_bind_tcp and connect to 192.168.146.12 through the session of 192.168.146.11
Generate a payload according to the following configuration and execute it on 192.168.146.12
Set up a new listening and connect
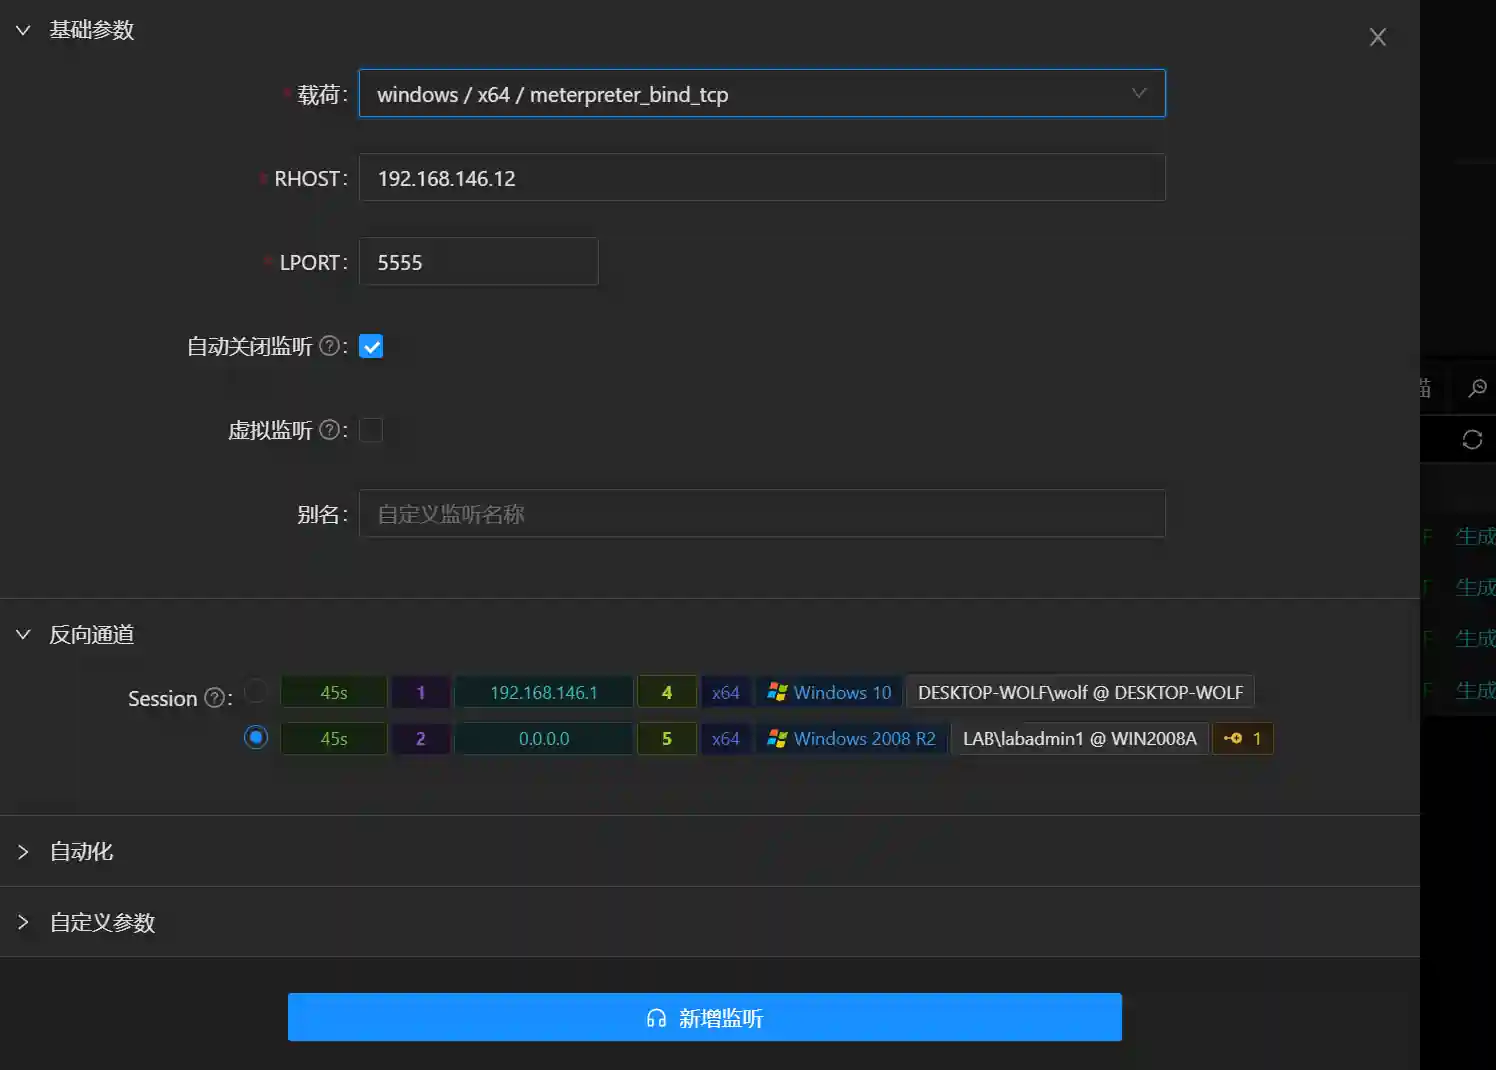
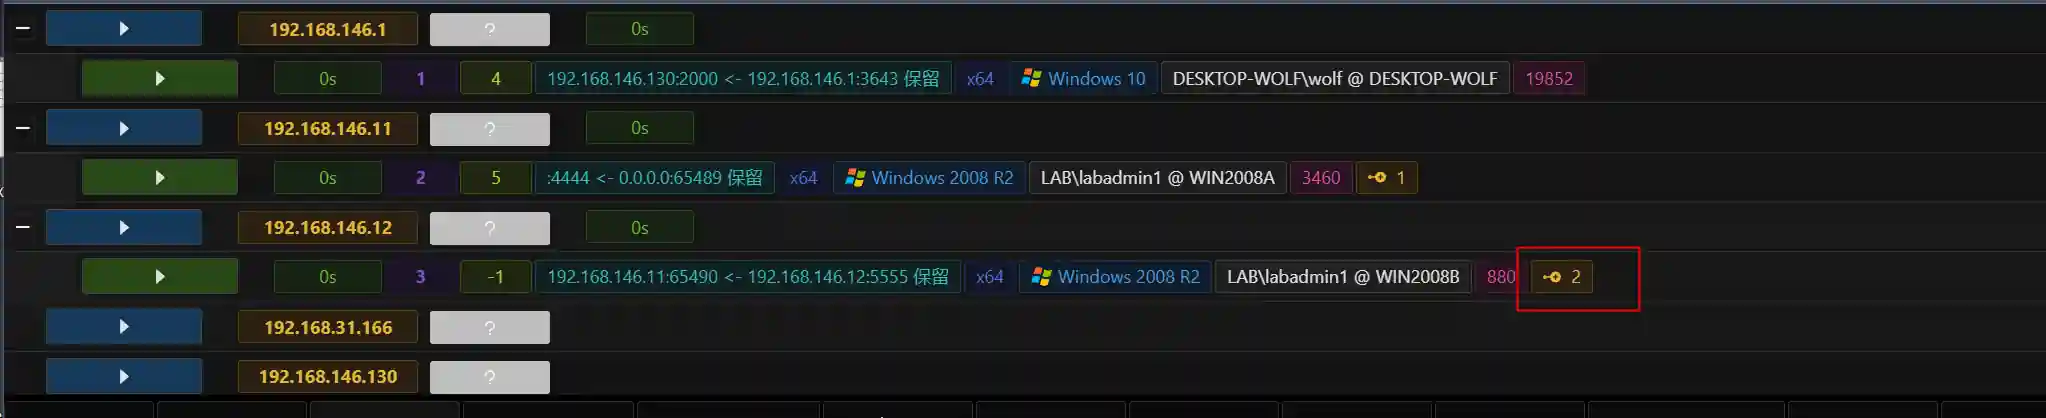
The red box indicates that Session 3 is connected through Session 2.
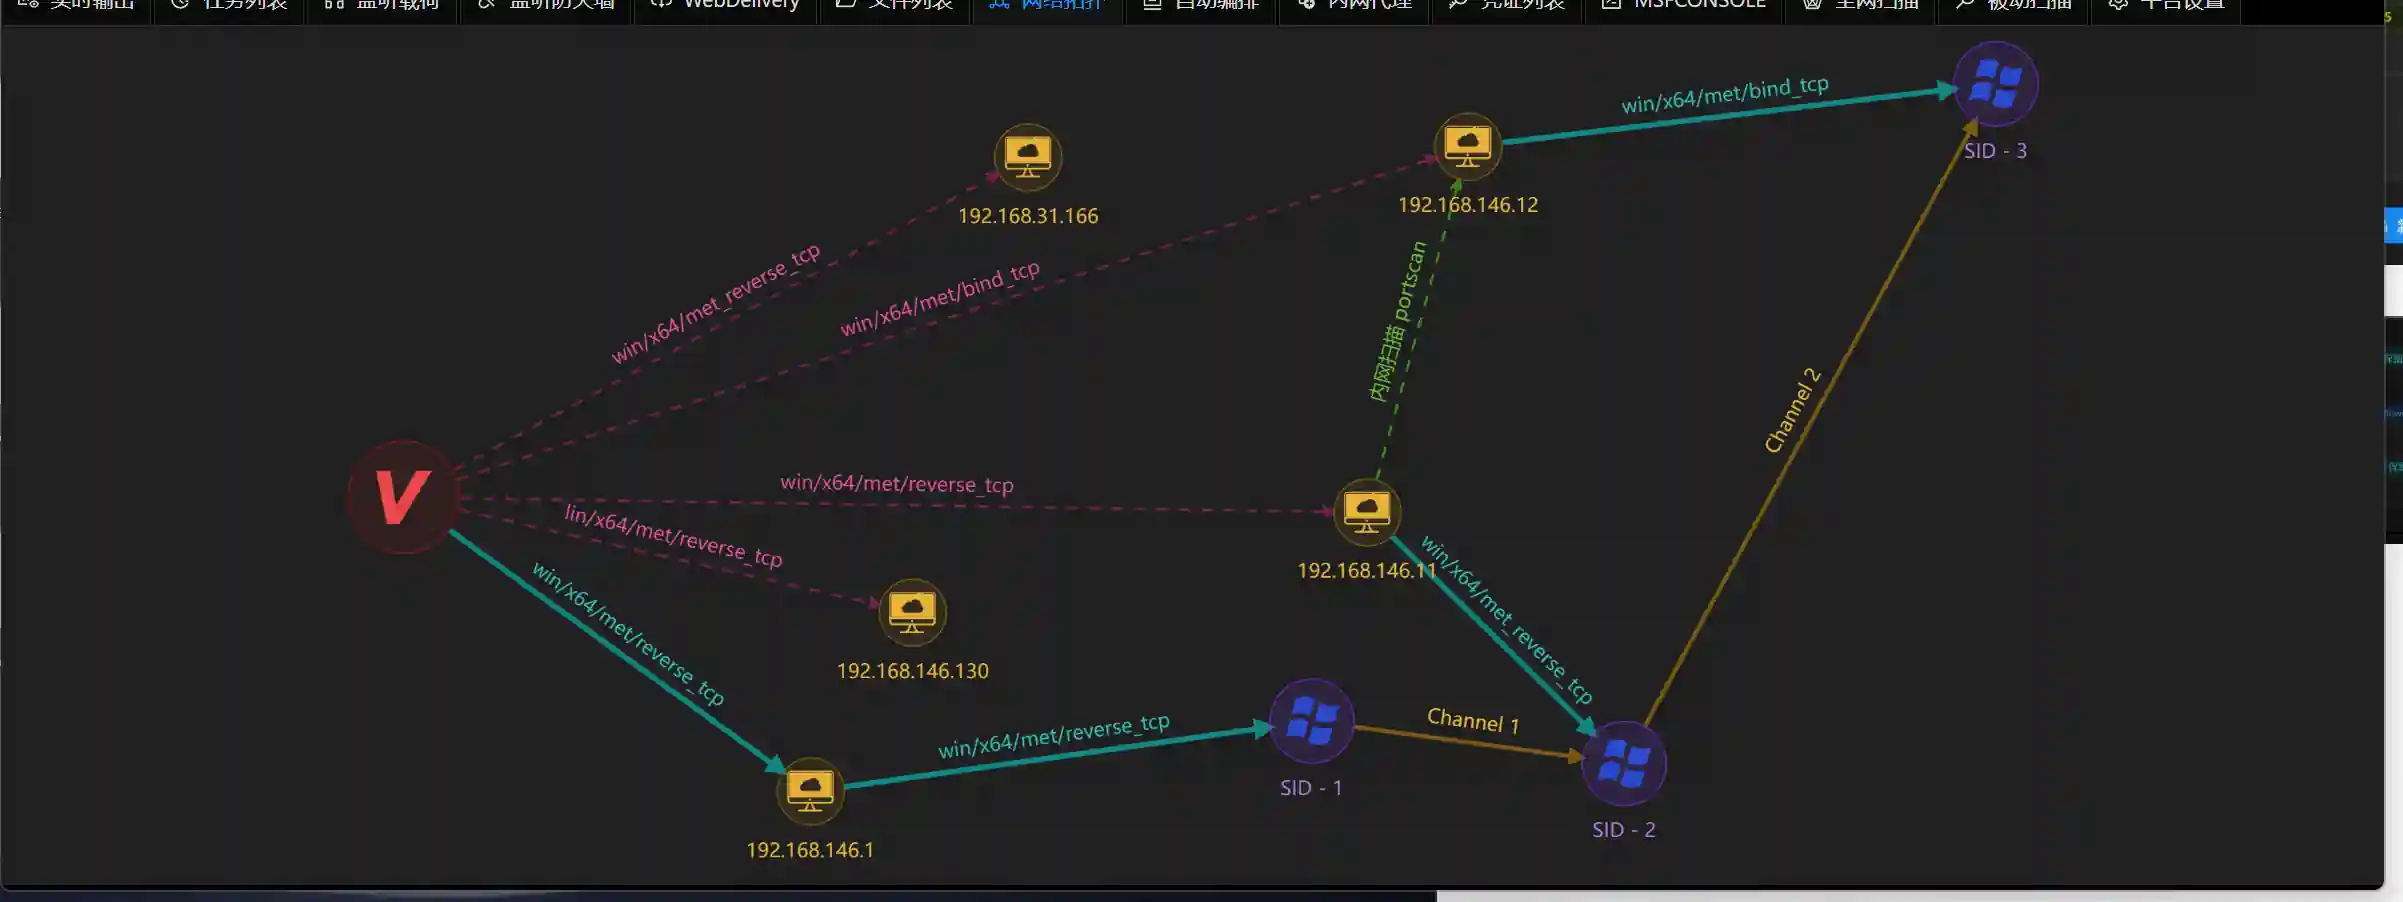
- Network topology
- Payload support list:
Windows/Linux
meterpreter_reverse_tcp
meterpreter_reverse_http
meterpreter_reverse_https
meterpreter/bind_tcp
meterpreter_bind_tcp